Homemade Almond Milk (Creamy, Not Watery)
- Gluten-free
- Soy-free
- Oil-free
In this guide7
- 01The one thing nobody tells you: blanched almonds
- 02The ratio that makes it creamy, not watery
- 03The full method, step by step
- 04Sweetened, vanilla, and the riffs worth making
- 05What to do with the leftover almond pulp
- 06Almond vs oat vs cashew: which milk for what
- 07Is store-bought almond milk vegan, and which brands are best
The first batch of almond milk I ever made was, by any honest measure, a disappointment. I had soaked a fistful of almonds in too much water, blended for about ten seconds, strained it, and ended up with a liter of pale, faintly nutty water that disappeared into my coffee without leaving a trace.
I remember tasting it over the sink and thinking, that is it? People wring out nut bags for this? It tasted like the rinse water from a bowl of almonds, and I nearly wrote the whole thing off.
What changed everything was a single piece of advice from a vegan baker at my local market: use more almonds, less water, and take the skins off. That one sentence turned the thin, sad version into something I actually crave.
So this is the guide I wish I had on day one. I will walk you through the ratio that makes almond milk creamy instead of watery, why blanched almonds matter so much, the sweet and vanilla riffs worth your time, what to use the leftover pulp for, and where store-bought genuinely earns its place.
The one thing nobody tells you: blanched almonds
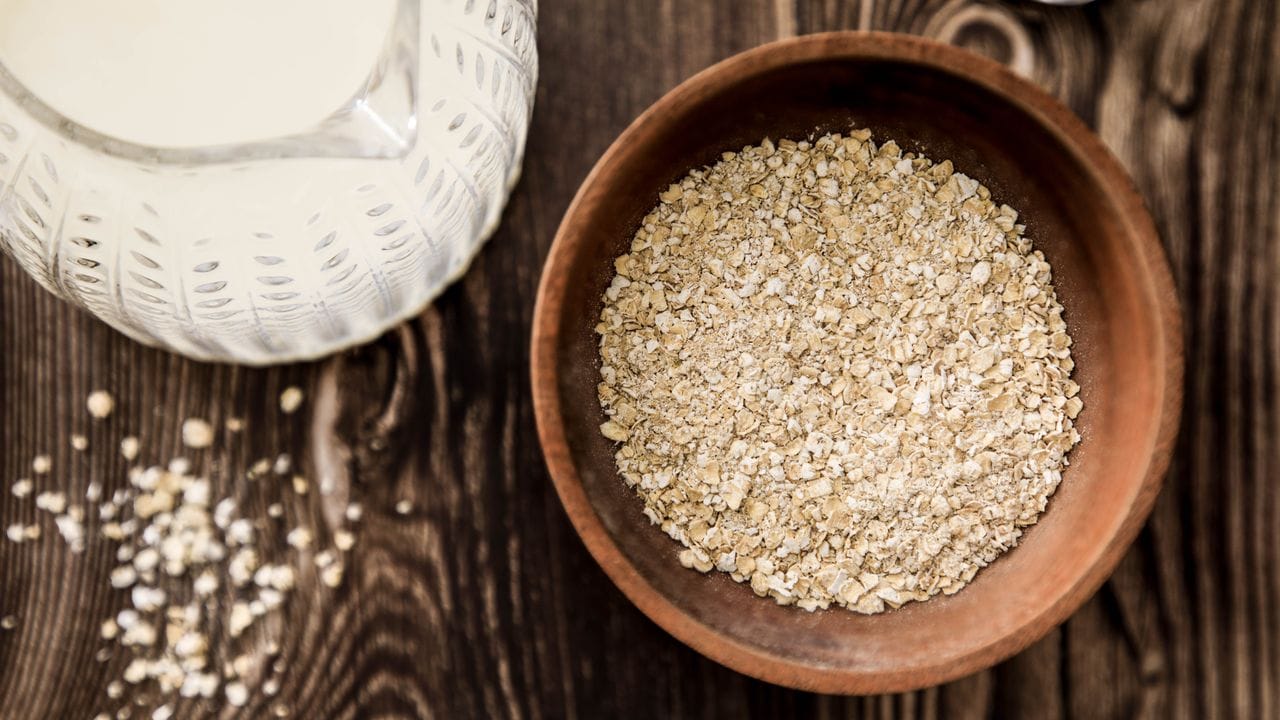
Here is the upgrade that took my almond milk from forgettable to genuinely good. Use blanched almonds, meaning almonds with the brown skins removed. This is the difference between a smooth, white, clean-tasting milk and a beige, faintly bitter, gritty one.
The skin of an almond is where most of the trouble lives. It holds the tannins that give raw almond milk that slightly astringent, drying edge, and it carries a lot of the tough, insoluble fiber that ends up as grit in your glass even after you strain.
When you take the skins off, you are removing the bitterness and a chunk of the gritty material before it ever gets into the blender. What you are left with is the soft, fatty, mild inside of the almond, which is exactly the part you want emulsified into your milk.
You have two easy ways to get there. The simplest is to buy almonds already blanched, which many shops stock right next to the regular ones.
The cheaper way is to blanch them yourself, which is genuinely satisfying: cover raw almonds with just-boiled water, let them sit for about an hour, and then pinch each almond between two fingers. The skin slides right off with a little pop.
It is a few minutes of fiddly work in front of a show, and your milk comes out noticeably creamier and whiter for it.
If you want to skip the skinning step, you can. Almond milk with the skins on still works, it just tastes more rustic and the pulp comes out browner. But if your goal is creamy and not watery, blanched is the lever I would pull first.
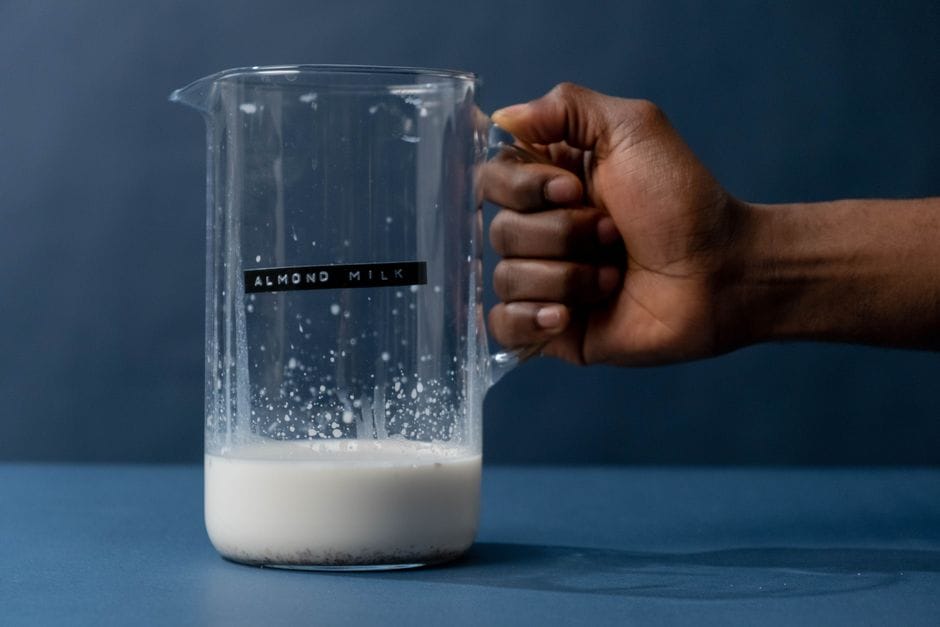
The ratio that makes it creamy, not watery
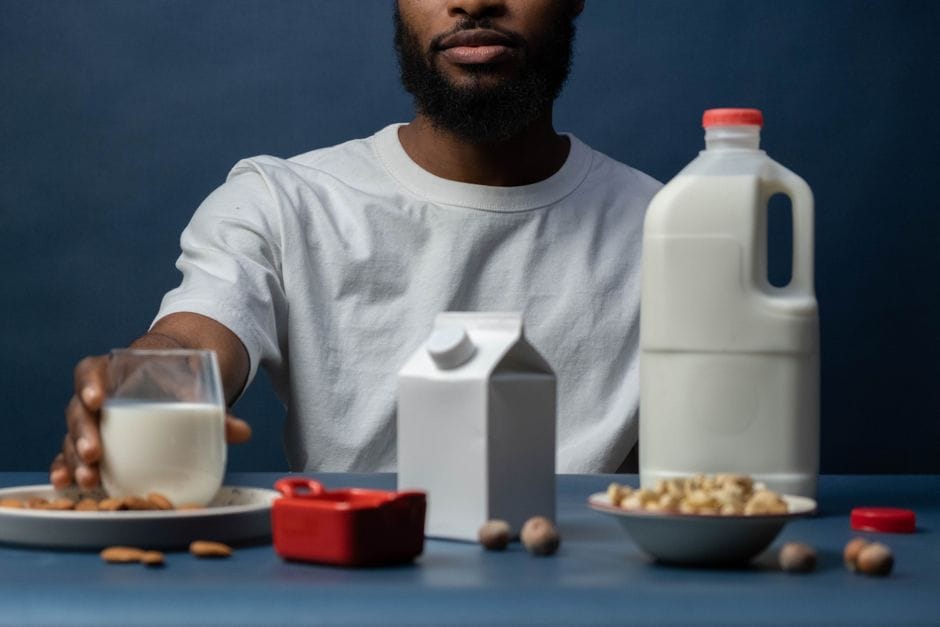 Photo: cottonbro studio / Pexels
This is where most disappointing almond milk goes wrong, mine included. The thickness of your milk is decided almost entirely by one number: how much water you add per cup of almonds.
The ratio I keep in my head is one cup of almonds to three cups of water for a creamy, rich milk that actually shows up in your coffee and over your cereal. If you want something lighter and more drinkable, closer to a skim milk, push it to four cups of water. If you want an extra-thick milk that holds its own in hot drinks, drop down to two and a half cups.
The almonds stay the same; only the water moves.
The mistake almost everyone makes (and the one I made on day one) is using too much water and too few almonds. A small handful of almonds in five cups of water gives you almond-flavored water, full stop.
Use a full cup of almonds, and do not be shy. Almond milk is supposed to be a little luxurious; this is not the place to ration the nuts.
My practical advice is to start thicker than you think you want. Blend with less water, taste it, then splash in more water and blend again for ten seconds to thin it down. You can always add water back.
You cannot pull it out once it is in, and I have absolutely ended up with two liters of thin milk when I wanted one liter of creamy. The same blend-and-thin logic applies to most homemade plant milks, including the cashew milk method, where the ratios shift but the principle holds.
The full method, step by step
The recipe card above has the exact quantities and timing, but here is how the process actually feels in the kitchen so nothing surprises you.
First, soak. Cover one cup of blanched almonds with cold water and leave them in the fridge for eight to twelve hours, or use the hot-soak shortcut and pour just-boiled water over them for one hour. Soaking softens the almonds so the blender can break them down fully.
Skip it and you will get a grainier milk and less of it, because hard almonds do not give up their creaminess easily.
Drain and rinse the almonds until the water runs clear, then add them to the blender with three cups of cold filtered water and a pinch of salt. Blend on high for sixty to ninety seconds.
You are watching for the water to turn fully white and opaque, with no visible chunks of almond left. If you stop too early, you leave creaminess in the unblended bits and pour it straight into the pulp.
Now strain. Set a nut milk bag over a bowl, pour the milk in, gather the top, and squeeze. This is the messy, slightly satisfying part.
Twist and wring the bag until only damp pulp is left and you have pulled every drop of milk out. A few layers of cheesecloth work if you do not own a nut bag, though they are fiddlier.
Pour the strained milk into a clean bottle, seal it, and refrigerate.
I will be honest with you: the straining is a real step, and there is no pretending otherwise. You will wash a bag, you will deal with pulp.
But the payoff is a fresh, creamy milk with nothing in it but almonds, water, and salt, and once you taste the difference, the five minutes of squeezing stops feeling like a chore.
Sweetened, vanilla, and the riffs worth making
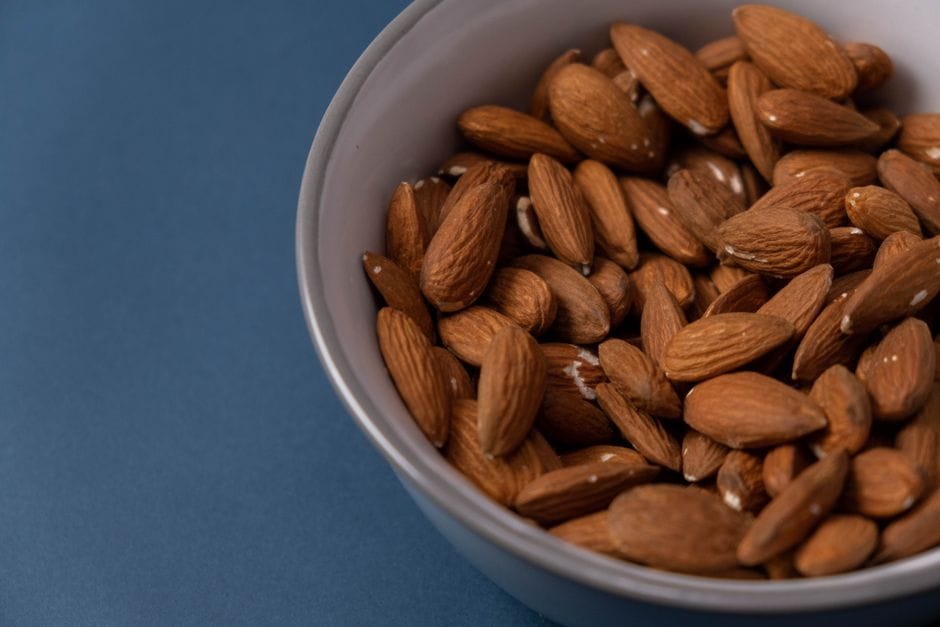 Photo: ROMBO / Pexels
Plain unsweetened almond milk is what I make most often because it goes everywhere, savory or sweet. But a few flavored versions are worth knowing.
For lightly sweetened milk, toss one or two pitted Medjool dates into the blender before you run it. The dates blend in completely and get strained along with everything else, so there is no extra step.
The result is gently sweet, the way good barista milk tastes, not dessert-sweet. If you have no dates, a teaspoon of maple syrup does a similar job.
For vanilla almond milk, add half a teaspoon of alcohol-free vanilla or a quarter teaspoon of vanilla powder. I call for alcohol-free on purpose, since standard vanilla extract is alcohol-based and I keep my kitchen alcohol-free. The vanilla version with a tiny pinch of cinnamon blended in is my favorite over cold cereal on a slow morning.
And do not skip the pinch of salt, sweet batch or plain. You will not taste it as salt. What it does is round out the flavor and stop the milk from tasting flat and hollow, the same way a little salt works in a dessert.
The one time I forgot it, the milk tasted oddly empty, and I could not figure out why until I remembered.
What to do with the leftover almond pulp
The pulp is where homemade almond milk earns back some of its effort, so please do not throw it in the bin. After straining, you are left with a bowl of damp, finely ground almond meal, and it is genuinely useful.
The classic move is to turn it into almond flour. Spread the pulp thin on a baking tray and dry it in a low oven, around 90 to 100 degrees Celsius, stirring now and then until it is completely dry and crumbly.
Blitz it once in a blender and you have a soft almond flour for baking. It is not as fine as store-bought blanched almond flour, but it is free and it works in muffins, cookies, and quick breads.
If drying it feels like too much, the pulp also stirs straight into things while it is still wet. I fold it into oatmeal, blend a scoop into smoothies, mix it into pancake batter, or press it into energy balls with dates and cocoa.
It adds a soft almond richness and a little fiber. You spent the almonds; you might as well eat all of them.
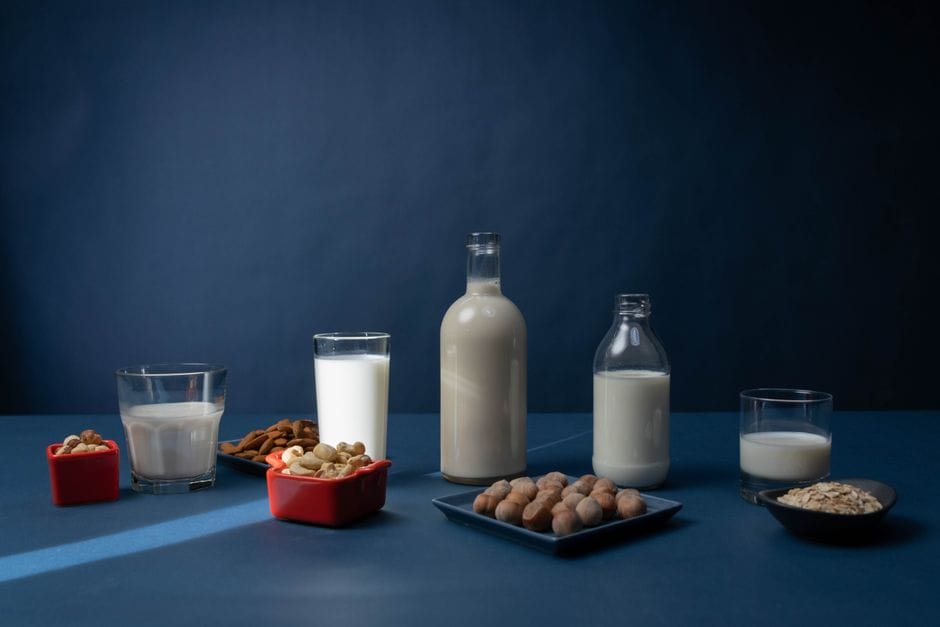
Almond vs oat vs cashew: which milk for what
People always ask which homemade milk is worth making, so here is my honest read after years of making all three.
Almond milk is the lightest and most neutral of the three, with a clean, faintly sweet flavor that does not take over a recipe. The trade-off is that it is the most labor: you soak, you blend, you strain, and you deal with pulp.
When you nail the ratio and use blanched almonds, though, it is creamy and lovely, and the pulp is a bonus ingredient rather than waste.
Cashew milk is the easy one. Because cashews are soft and have almost no insoluble fiber, you can blend and skip straining entirely, which is why it is my pick on a lazy week. The full no-strain method lives in the cashew milk guide.
Oat milk is the cheapest and the creamiest for coffee thanks to its body, but it turns slimy if you over-blend and can split in hot drinks, so it rewards a careful hand. If oat is your milk, I wrote a full method for getting the texture right in the oat milk guide.
For pure neutral flavor and a milk that disappears nicely into cooking and baking, almond is my answer. For least effort, cashew. For coffee and cost, oat.
There is no wrong choice, only the right one for the day.
Is store-bought almond milk vegan, and which brands are best
Good news: store-bought almond milk is almost always vegan. The base is almonds and water, and the common stabilizers (gellan gum, locust bean gum, sunflower lecithin) are all plant-derived. There is no dairy lurking in it the way there can be in some processed foods.
Two label details are worth a glance. The first is added vitamin D. Vitamin D2 is vegan, but vitamin D3 is often derived from lanolin, which comes from sheep wool, so a fortified milk can technically slip out of vegan territory.
The second is vague terms like natural flavors, which are usually fine but occasionally not. If a label ever gives you pause, run it through our vegan ingredient checker or look the product up in the Is It Vegan database before you buy.
According to The Vegan Society's animal-derived ingredients list, vitamin D3 and lanolin are exactly the kind of hidden additives worth learning to spot.
For brands, Elmhurst Milked Almonds is the clean-label standout, since it is essentially just almonds and water with no gums, the closest store option to homemade. For everyday cartons that hold up in coffee and last for weeks, Califia Farms, Silk, and So Delicious are reliable, widely stocked, and clearly labeled.
Formulations change, so always glance at the current ingredient panel rather than trusting a brand name forever.
Here is my takeaway after years of both: make the homemade version when you want something fresh, creamy, and made of nothing but almonds, water, and salt, and keep a clean carton in the fridge for coffee and busy weeks. The secret to homemade was never the equipment.
It was using enough almonds, taking the skins off, and holding back on the water. Get those three right and you will never make a watery batch again.
The recipe
Homemade Almond Milk (Creamy, Not Watery)
Prep
15 min
Total
15 min
Makes
3 to 4 cups (about 700 to 950 ml)
Ingredients
- 1 cup (140 g) raw almonds (blanched, skins removed, for the creamiest result)
- 3 cups (700 ml) cold filtered water, for creamy milk (use 4 cups for a thinner, lighter milk)
- Pinch of fine sea salt (it rounds out the flavor, you will not taste salt)
- 1 to 2 Medjool dates, pitted (optional, for lightly sweetened milk)
- 1/2 tsp alcohol-free vanilla, or 1/4 tsp vanilla powder (optional)
- Tiny pinch of ground cinnamon (optional, very good with the vanilla version)
- Just-boiled water, for soaking and for slipping off skins if you blanch your own
Instructions
- 1 Soak the almonds: cover with cold water and soak 8 to 12 hours in the fridge, or use the hot-soak shortcut by covering with just-boiled water and resting 1 hour.
- 2 If your almonds still have skins, pinch each one and the skin will slip right off after the hot soak. Discard the skins for a smoother, whiter milk.
- 3 Drain the almonds and rinse them under cold running water until the water runs clear.
- 4 Add the almonds, the cold filtered water, salt, and any optional add-ins to a blender.
- 5 Blend on high for 60 to 90 seconds, until the water turns fully white and opaque and you see no large almond pieces left.
- 6 Set a nut milk bag (or a few layers of cheesecloth) over a bowl, pour in the milk, and gather the top of the bag.
- 7 Squeeze and twist firmly until you have wrung out all the liquid and only damp pulp remains in the bag.
- 8 Pour the milk into a clean bottle or jar, seal, and refrigerate. Shake well before every use, since it settles as it sits.
Notes
- ·Ratio guide: 1 cup almonds to 3 cups water is creamy and rich. Push to 4 cups for a lighter, more drinkable milk. Drop to 2.5 cups for an extra-thick milk that holds up in coffee and cereal.
- ·Start with less water and blend, then thin to taste. You can always add water back, you cannot take it out.
- ·Blanched (skinless) almonds are the real lever for creamy, not watery. The skins carry the bitterness and grit, so removing them changes the texture more than any other step.
- ·Save the pulp. Spread it on a tray and dry it low in the oven for homemade almond flour, or stir it into oatmeal, pancakes, and energy balls.
Calories
40 per cup (unsweetened)
Protein
1.5 g
Fat
3 g
Carbs
2 g
Frequently asked questions
Why is my homemade almond milk so watery and thin?+
Two reasons, almost always. The first is your ratio: if you used four or more cups of water per cup of almonds, you made a thin milk by design. Drop to three cups of water for a creamy result. The second is the almonds themselves. A handful of raw almonds in a lot of water gives you faintly almond-flavored water, not milk. Use a full cup of almonds, soak them properly, and blend long enough that the water turns genuinely white and opaque before you strain.
Do I have to use blanched almonds, or can I leave the skins on?+
You can leave the skins on, but blanched almonds (skins removed) give you a noticeably creamier, whiter, and less bitter milk. The brown skins hold most of the tannins and the gritty fiber, so removing them is the single biggest upgrade for a smooth result. You can buy almonds already blanched, or slip the skins off yourself after a hot soak. If you keep the skins on, your milk will taste a touch more rustic and the pulp will be browner.
How long does homemade almond milk last in the fridge?+
Three to five days in a sealed bottle or jar. There are no preservatives or gums, so it has a short life and it will separate as it sits, which is completely normal. Shake it hard before every pour. Make smaller batches more often rather than one large batch that lingers. If it ever smells sour or tastes sharp before day five, pour it out and start fresh.
Is store-bought almond milk vegan?+
Almost always, yes. The base is almonds and water, and the usual additives (gellan gum, locust bean gum, sunflower lecithin) are plant-derived. The two things to check are added vitamin D3, which is often sourced from sheep wool, and vague natural flavors. Vitamin D2 is vegan, D3 frequently is not. When a label makes you hesitate, run it through an ingredient checker before you buy.

Written by
VeganDigest Editorial is the small independent team that researches and fact-checks this site. We are not doctors or dietitians. For every is-it-vegan verdict we read the product's current ingredient list and manufacturer information, and for anything health-related we report guidance from recognized bodies such as the NHS, the Vegan Society, and the Academy of Nutrition and Dietetics rather than offering medical advice. Every page shows the date it was last verified, and our full process is on the How We Verify page.
Comments