How to Cook Dried Chickpeas (Stovetop and Instant Pot)
 Jump to recipe ↓
 In this guide8
I keep a bag of dried chickpeas in my cupboard the way some people keep a spare phone charger. They are the thing I reach for when the fridge is bare and payday is days off.
A pound costs me less than a coffee, and it turns into roughly three cans' worth of chickpeas that are creamier, nuttier, and infinitely better than anything I have spooned out of a tin. The catch, and the reason a lot of people never bother, is that dried chickpeas are stubborn.
They take longer than almost any other common bean to soften, and they punish you for guessing at the timing.
So this is the guide I wish someone had handed me. Not the soak-or-die lecture, not the salt panic, just the two methods I actually use, where chickpeas behave differently from other beans, and the two chickpea-specific tricks that change everything: baking soda for smoothness, and saving the aquafaba.
Why dried chickpeas beat canned
Let me make the case before you commit an evening to a pot. Canned chickpeas are fine. I keep a couple of tins around for the nights I have zero patience.
But they are cooked to a uniform, slightly mushy softness and seasoned with whatever salt the cannery decided on, and there is a faint flatness to them that I notice every time.
Dried chickpeas you cook yourself have texture. You control the salt, the firmness, the aromatics.
They cost a fraction of the canned price, around 80 cents to a dollar a pound for store brands and a bit more for something like Bob's Red Mill or a heritage bean from Rancho Gordo. And dried chickpeas store for years in a sealed jar, so a few bags in the cupboard is genuine, low-effort food security.
They are also one of the oldest cultivated foods we have: the chickpea, Cicer arietinum, has been grown and eaten for thousands of years, which is part of why so many cuisines know exactly what to do with it.
If you are cooking chickpeas to put into a packaged sauce or a boxed broth, by the way, it is worth a quick sanity check that the other ingredients are actually plant-based. Boxed stocks and simmer sauces sneak in things you would not expect.
I run anything questionable through the vegan ingredient checker or look the brand up in the Is It Vegan database before it goes in the pot.
Soaking: overnight or quick
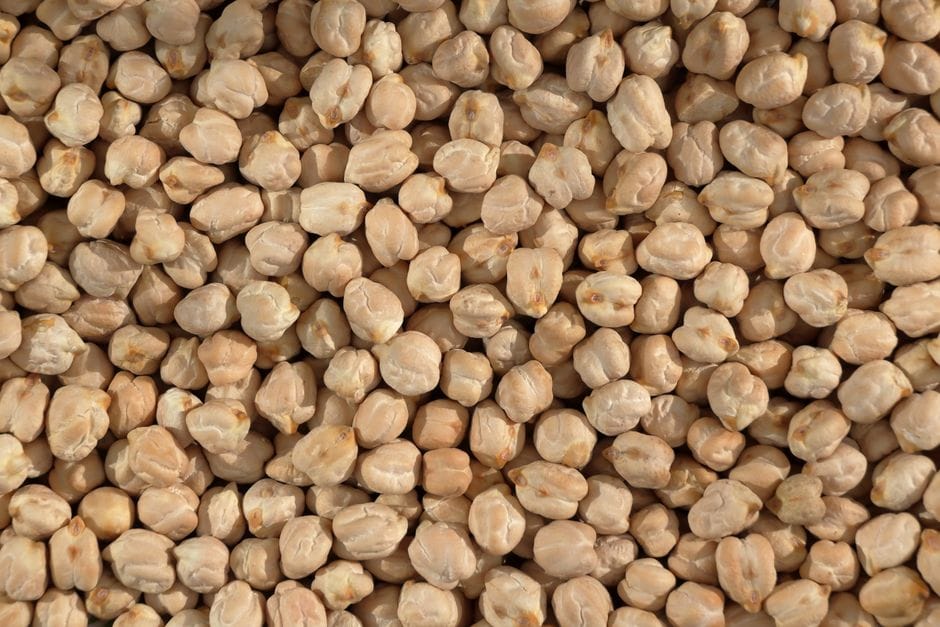
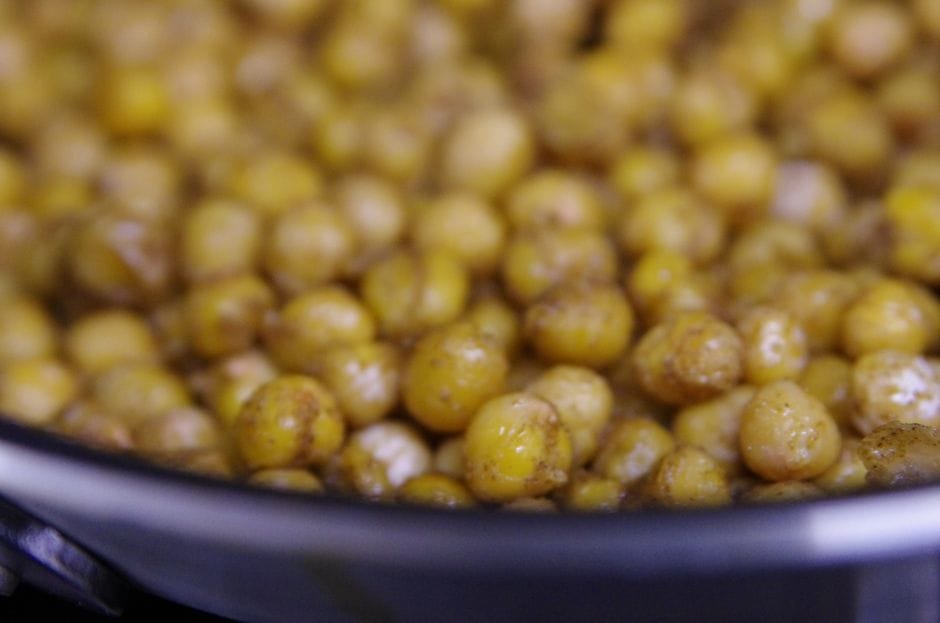 Photo: Kyle Killam / Pexels
You do not strictly have to soak chickpeas, but with chickpeas specifically I almost always do, because they are so dense that unsoaked they can run past the two-hour mark on the stove.
For an overnight soak, put the chickpeas in a large bowl, cover them with cold water by at least three inches, and leave them on the counter for eight to twelve hours. They roughly double in size and drink up a startling amount of water, so be generous. Drain and rinse before cooking.
If you forgot to plan ahead, which is me most of the time, do a quick soak. Put the chickpeas in a pot, cover with water by a few inches, bring to a boil for two minutes, then turn off the heat, put the lid on, and let them sit for one hour.
Drain, rinse, and cook as normal. The result is genuinely the same as an overnight soak.
One honest note: a teaspoon of baking soda in the soaking water speeds things up even more, because the alkaline water starts breaking down the skins before cooking even begins. I do this when I know the chickpeas are headed for hummus. I skip it when I want them whole and intact.
Stovetop method
This is my default, and the method that gives chickpeas the most flavor.
Drain your soaked chickpeas and tip them into a heavy pot. Cover with fresh cold water by at least two to three inches, since they keep absorbing as they cook.
I add a halved onion, a couple of smashed garlic cloves, and a bay leaf, because chickpeas are bland on their own and reward a little aromatic backup. Bring to a boil, skim off the gray foam that rises in the first few minutes, then drop to a low, steady simmer with the lid ajar.
Soaked chickpeas take about 60 to 90 minutes. Unsoaked, you are looking at two hours or more, and you will need to keep topping up the water. Start tasting at the one-hour mark.
The variable nobody warns you about is age: chickpeas that have sat in a bag at the back of the shelf for two years can take dramatically longer and sometimes never fully soften, which is a real argument for buying from a shop with decent turnover.
Keep the simmer gentle. A hard, rolling boil bangs the chickpeas against each other and the pot, which strips the skins and breaks them up before they are even tender. You want a lazy bubble, barely moving, with the lid set slightly off so steam escapes.
If you have a hard-water area, you may notice your chickpeas take longer than the times above, since the dissolved minerals slow the softening; a pinch of baking soda fixes it, with the trade-offs I cover below. I cook a full pound at a time and freeze the leftovers, because the stove is on for the same length whether you make one cup or six.
Instant Pot method
 Photo: Nataliya Vaitkevich / Pexels
The Instant Pot, or any pressure cooker, is where chickpeas stop being a project. It roughly halves the time and you do not have to hover.
Add your drained soaked chickpeas, water to cover by about two inches, salt, and aromatics if you like. Seal the lid, set the valve to sealing, and cook on high pressure. Soaked chickpeas need around 12 to 15 minutes.
Unsoaked chickpeas, straight from the bag, take about 40 minutes, which is genuinely useful on a day you forgot to plan.
The part people rush is the release. Let the pressure come down naturally for at least 15 minutes before you touch the valve. A fast release sends the chickpeas knocking around violently and bursts the skins, leaving you with a pot of half-mush.
Natural release gives you whole, intact beans. On my Instant Pot Duo I just walk away and come back when the float valve has dropped.
Salt and baking soda: when and how much
Two additions, two completely different jobs, and getting the timing right is most of the battle.
Salt first, because the myth refuses to die: salting the cooking water does not make chickpeas tough. Add about a teaspoon of fine salt per pound right at the start, when the beans go into the pot.
Salt seasons them all the way through, and chickpeas seasoned only at the end always taste a little hollow to me. I use Diamond Crystal, so if you cook with Morton or table salt, scale back a touch since it is denser by volume.
Baking soda is the chickpea-specific lever, and it is genuinely powerful. A small amount, around half a teaspoon per pound in the cooking water, raises the pH and makes the chickpeas soften faster while loosening the skins so they slough right off.
This is the secret behind silky restaurant hummus. The downside is real, though: too much baking soda gives a soapy, slightly metallic taste and turns the beans to mush, and the alkaline water does degrade some of the thiamin. So use it with intent.
For hummus, yes. For a chickpea salad or a stew where you want them to hold their shape, leave it out.
If acid is going into your dish, tomatoes, lemon, or vinegar, add it only after the chickpeas are fully tender. Acid does the opposite of baking soda. It firms up the cell walls and will keep undercooked chickpeas stubbornly chalky no matter how long you simmer.
I learned that the hard way with a tomato stew that left me with waxy chickpeas in an otherwise perfect sauce.
How to tell when they are done
Taste, do not time. A done chickpea collapses easily when you press it between your tongue and the roof of your mouth, creamy all the way through with no gritty or chalky center.
A second check I use: scoop out three or four chickpeas and blow on them. If the skins wrinkle and start peeling back, they are done. For hummus I take them a stage further, until they are almost falling apart, because softer means smoother.
For a salad I stop the moment they are tender but still whole.
If you find yourself with a lot of loose skins floating in the pot, that is normal, especially if you used baking soda. Skim them off, or for the smoothest possible hummus, rub the warm chickpeas in a clean towel and lift the skins away.
Save the aquafaba
Do not pour the cooking liquid down the drain. That cloudy, starchy water is aquafaba, and it is one of the best plant-based egg replacers there is. The starches and proteins that leach out of the chickpeas let it whip, bind, and emulsify in a way that genuinely mimics egg white.
Here is the honest caveat for home cooks: the liquid from your own pot is usually thinner and more variable than the thick stuff inside a can, because cans sit under pressure for a long time. If you want aquafaba for whipped meringue or a fluffy mousse, pour your cooking liquid into a small pan and simmer it down until it coats a spoon and looks like loose egg white.
For folding into pancake or waffle batter as a binder, the liquid straight from the pot works fine with no reducing at all.
Three tablespoons of aquafaba stands in for one whole egg, and two tablespoons for one egg white. It whips into a glossy vegan mayonnaise with a stick blender and a steady stream of oil, and it is the base of countless egg-free bakes.
If aquafaba is not on hand, a flax egg covers most binding jobs in baking, though it will not whip to volume the way aquafaba does. Aquafaba keeps in the fridge for about a week, and it freezes well in an ice cube tray so you always have some ready.
Storing your cooked chickpeas
Cooked chickpeas keep in the fridge for about five days in a covered container. Store them in their cooking liquid rather than drained, because the liquid keeps them from drying out and tightening up.
They freeze beautifully too, up to three months. I freeze them in their liquid in portion-sized tubs, which thaw into ready-to-use chickpeas plus a little starchy stock for soups. Dried chickpeas in the cupboard last two to three years in a sealed jar, though remember that cook time creeps up as they age.
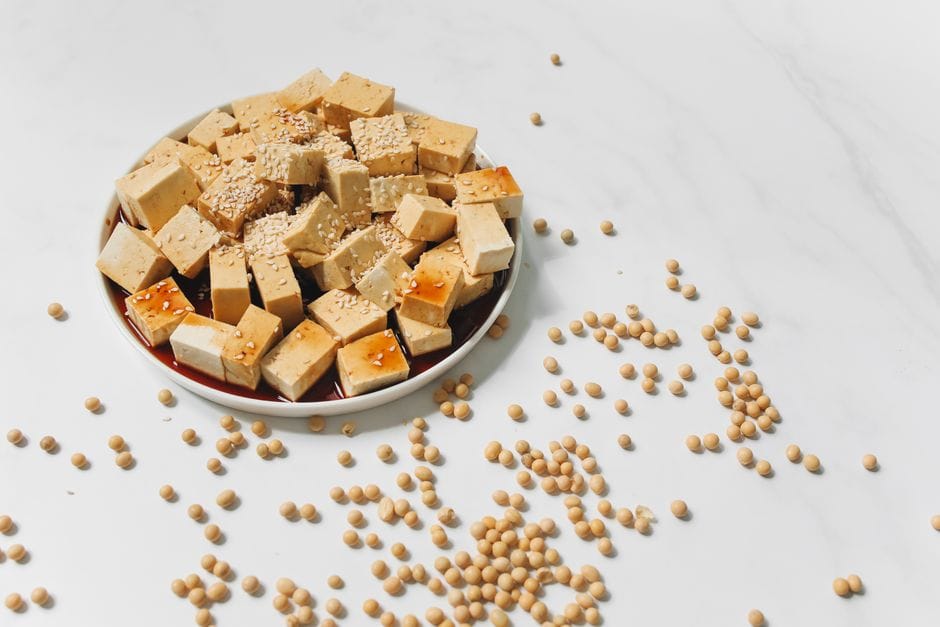
Once you have a good pot of chickpeas, they slot into almost everything. They roast crisp with smoked paprika, they blend into hummus, they pile onto toast, and they bulk out grain bowls alongside things like marinated tofu.
If you want more from-scratch staples to build a pantry around, the how-to guides and the vegan substitutes hub are where I would go next.
Cook one pot this week. Soak overnight, simmer with salt and a bay leaf, save the aquafaba, and taste the first one straight from the pot before you season anything else. That single chickpea will tell you everything about why the dried bag earns its place in the cupboard.
The recipe
How to Cook Dried Chickpeas (Stovetop)
Prep
1h 5m
Cook
1h 15m
Makes
about 6 cups cooked (6 servings)
Ingredients
- 1 pound (450 g) dried chickpeas
- Cold water for soaking and cooking (enough to cover by at least 3 inches for soaking, at least 2 to 3 inches for cooking)
- 1 teaspoon fine salt (Diamond Crystal; use a little less if using Morton or table salt)
- 1/2 small onion, halved
- 2 garlic cloves, smashed
- 1 bay leaf
- 1/2 teaspoon baking soda (optional, for hummus use only)
Instructions
- 1 Quick soak: Put the dried chickpeas in a large pot and cover with cold water by a few inches. Bring to a boil and boil for 2 minutes, then turn off the heat, put the lid on, and let them sit for 1 hour. Drain and rinse well. (Alternatively, soak overnight: cover chickpeas with cold water by at least 3 inches and leave on the counter for 8 to 12 hours, then drain and rinse.)
- 2 Tip the drained soaked chickpeas into a heavy pot. Cover with fresh cold water by at least 2 to 3 inches.
- 3 Add the salt, halved onion, smashed garlic cloves, and bay leaf. If cooking for hummus and you want very smooth results, add the optional baking soda (1/2 teaspoon per pound).
- 4 Bring to a boil, then skim off any gray foam that rises in the first few minutes.
- 5 Reduce to a low, steady simmer with the lid set slightly ajar. Cook for 60 to 90 minutes, keeping the bubble lazy and barely moving. Add more water as needed to keep the chickpeas submerged.
- 6 Start tasting at the 1-hour mark. A done chickpea collapses easily when pressed between your tongue and the roof of your mouth, creamy all the way through with no gritty or chalky center. As a second check, blow on a few scooped-out chickpeas: if the skins wrinkle and start peeling back, they are done.
- 7 Remove the onion, garlic, and bay leaf. Salt to taste and serve, or cool and store in their cooking liquid.
- 8 Reserve the cooking liquid (aquafaba) rather than discarding it. For whipping or meringue, simmer it down until it coats a spoon. For batter or binding, use it straight from the pot. Three tablespoons equals one whole egg; two tablespoons equals one egg white.
Notes
- ·For the Instant Pot method, add drained soaked chickpeas, water to cover by 2 inches, salt, and aromatics. Cook on high pressure for 12 to 15 minutes (soaked) or 40 minutes (unsoaked), then allow a natural pressure release for at least 15 minutes before opening.
- ·Do not add tomatoes, lemon juice, or vinegar until the chickpeas are fully tender. Acid firms the cell walls and will keep undercooked chickpeas chalky no matter how long you simmer.
- ·Older dried chickpeas take significantly longer to cook and may never fully soften. Buy from a shop with decent turnover.
- ·Store cooked chickpeas in their cooking liquid in the fridge for up to 5 days, or freeze in liquid for up to 3 months.
Frequently asked questions
How long do dried chickpeas take to cook?+
On the stovetop, soaked chickpeas take about 60 to 90 minutes at a gentle simmer, and unsoaked ones can take two hours or more. In an Instant Pot, soaked chickpeas need around 12 to 15 minutes at high pressure, and unsoaked ones about 40 minutes, both with a natural pressure release. Age matters too, since older beans cook slower.
Should I add baking soda when cooking chickpeas?+
Only if you want very soft, smooth chickpeas for hummus. About half a teaspoon per pound, added to the cooking water, raises the pH and softens the skins fast. Skip it if you want chickpeas that hold their shape in a salad or stew, because too much gives a soapy taste and blown-out, mushy beans.
Can I use the cooking liquid from dried chickpeas as aquafaba?+
Yes, but it is usually thinner than the liquid from a can. Home cooking liquid varies a lot, so for whipping into meringue or mayo you often need to simmer it down until it coats a spoon. For folding into batters or as an egg replacer, the unreduced liquid works fine straight from the pot.
Do I have to soak chickpeas before cooking?+
No, but soaking cuts the cook time by roughly a third to a half and makes them gentler on digestion. A quick soak, where you boil them briefly and rest them for an hour, works as well as an overnight soak. Unsoaked chickpeas still cook fine, they just take a good deal longer.

Written by
VeganDigest Editorial is the small independent team that researches and fact-checks this site. We are not doctors or dietitians. For every is-it-vegan verdict we read the product's current ingredient list and manufacturer information, and for anything health-related we report guidance from recognized bodies such as the NHS, the Vegan Society, and the Academy of Nutrition and Dietetics rather than offering medical advice. Every page shows the date it was last verified, and our full process is on the How We Verify page.
Comments