Vegan Ice Cream Base (No-Churn and Custard Methods)
- Gluten-free
- Soy-free
In this guide8
- 01The two jobs every ice cream base has to do
- 02Method one: the cashew-coconut custard base
- 03Method two: the no-churn condensed-coconut base
- 04How to get it scoopable, not icy
- 05Flavor add-ins that actually work
- 06Is store-bought vegan ice cream actually vegan?
- 07The best store brands worth buying
- 08The bottom line
The first batch of vegan ice cream I ever made came out of the freezer looking like a beautiful pint and scooping like a cinderblock. I bent a spoon on it.
Literally bent the neck of a metal spoon trying to get a scoop, while my partner watched and said nothing, which is its own kind of feedback. It tasted fine once it melted enough to eat with a fork, but nobody wants to eat ice cream with a fork.
That brick taught me the real problem with homemade dairy-free ice cream, and it is almost never flavor. It is texture. Get the texture right and the rest is easy.
So this guide is mostly about that: how to build a base that freezes soft and scoopable instead of into a frozen rock. I will walk you through the two methods I actually use, a proper cashew-coconut custard for when I want the best possible result, and a three-ingredient no-churn version for when I do not feel like dragging out the machine.
Then I will tell you the store brands worth buying when you want none of this work.
The two jobs every ice cream base has to do
Here is the thing nobody tells you when you start. A good ice cream base is fighting two battles at once: it needs enough fat, and it needs enough sugar. Skip either and you get ice, not ice cream.
Fat is what coats the tiny ice crystals as they form and physically stops them from clumping into big, crunchy, tooth-aching shards. Dairy ice cream gets this fat from cream and egg yolks. We get it from cashews and full-fat coconut milk.
Sugar does a different job. It lowers the freezing point of the base, so even at freezer temperature part of the mixture stays slightly soft instead of solid. That is what lets your scoop dig in.
The single most common mistake I see, and the one I made, is treating sugar as optional and cutting it for health reasons. Cut the sugar and your ice cream freezes harder, not lighter.
If you want it less sweet, the move is a different recipe entirely, not just less sugar in this one. Fat and sugar are structural here. They are not just flavor.
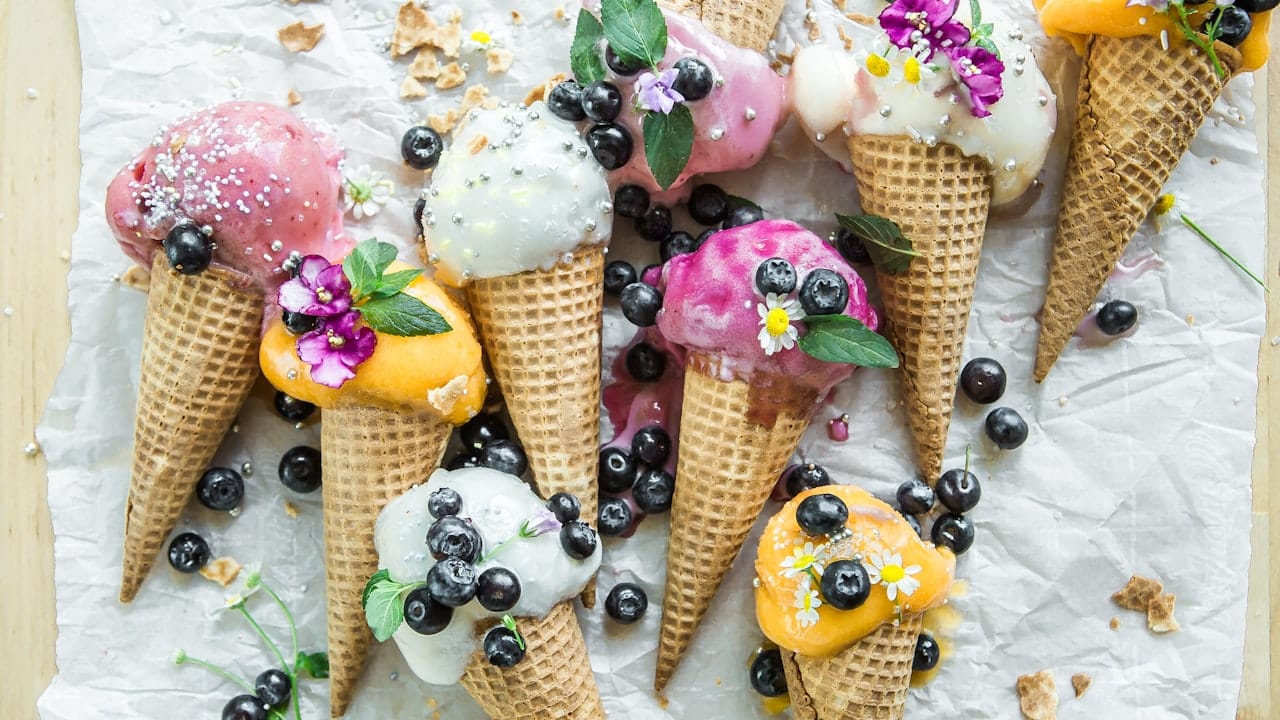
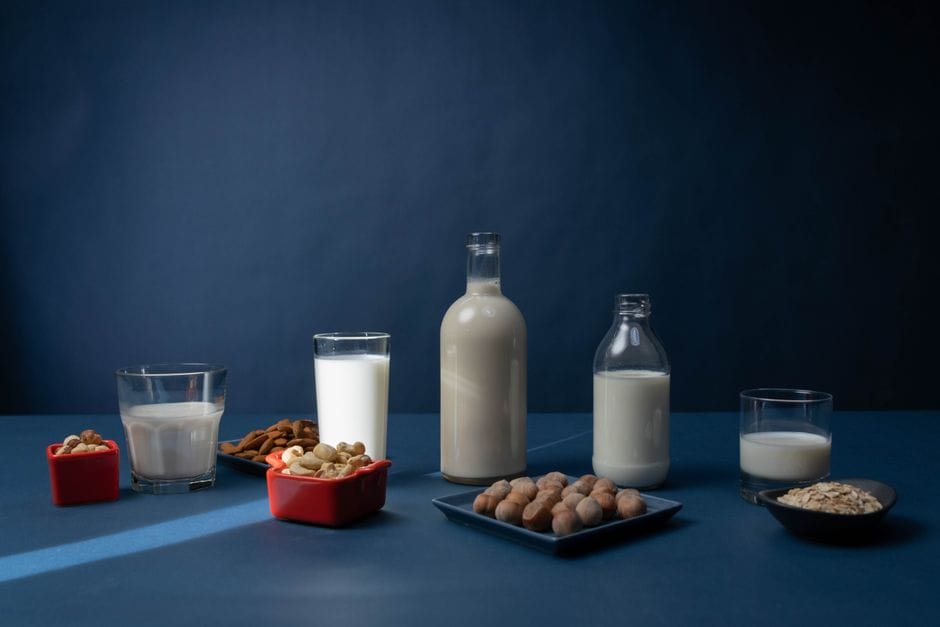
Method one: the cashew-coconut custard base
 Photo: 5010 / Unsplash
This is the recipe in the card above, and it is the one I make when I want the smoothest, most luxurious result. The cashews give it body and a neutral richness so it does not taste aggressively of coconut, and the coconut milk brings the fat.
Cooking it into a custard with a little cornstarch is the secret that makes it taste like real ice cream instead of like a frozen smoothie.
Why cook it at all? Because the cornstarch does the job egg yolks do in classic custard. It thickens the base and traps the water so it cannot freeze into coarse crystals.
An uncooked blended base will work, but it freezes harder and tastes thinner. The eight minutes of whisking over the stove is genuinely worth it, and it is the step beginners skip most often.
A few things I learned the hard way. Soak your cashews until they are truly soft, or you will get a faintly sandy base that no amount of blending fixes. If you are short on time, cover them with just-boiled water for 30 minutes and they soften enough.
Blend longer than feels necessary, a full 90 seconds on high, and stop once to scrape the sides so nothing stays gritty at the bottom. Watch the custard closely on the stove, because cornstarch goes from runny to set quickly, and you want it just thick enough to coat a spoon, not gluey.
And chill the base completely before churning, overnight if you can, because a warm base in the churner just melts the machine's frozen bowl and never sets. If you want to understand the cashew side of this better, my full walkthrough on how to make cashew cream covers soaking and blending in more detail.
Method two: the no-churn condensed-coconut base
Some nights I do not want a custard and a four-hour chill and a churning machine. This is the method for those nights, and honestly it is the one most people in my life make on repeat because it needs no special equipment at all.
It works on a simple trick. You whip cold coconut cream until it is fluffy and full of air, then fold in sweetened condensed coconut milk, and freeze the whole airy mass in a loaf tin.
The whipped-in air is doing the exact job a churner does, which is keeping the base light so it does not freeze dense and solid. The condensed milk brings both the sugar and extra fat that keep it scoopable.
You can buy canned condensed coconut milk, or make your own following my guide on vegan condensed milk.
Here is the method, start to finish. Chill a 13.5 oz can of coconut cream in the fridge overnight, then scoop only the thick white solid into a cold bowl and whip it with a hand mixer for 2 to 3 minutes until it holds soft peaks.
Fold in 1 cup of sweetened condensed coconut milk, 1 tablespoon of vanilla, and a pinch of salt with a spatula, gently, so you keep the air. Pour it into a loaf tin, press parchment onto the surface, and freeze 6 hours or overnight.
The texture is a little softer and more fluffy than the custard version, almost like frozen mousse, and I love it for exactly that.
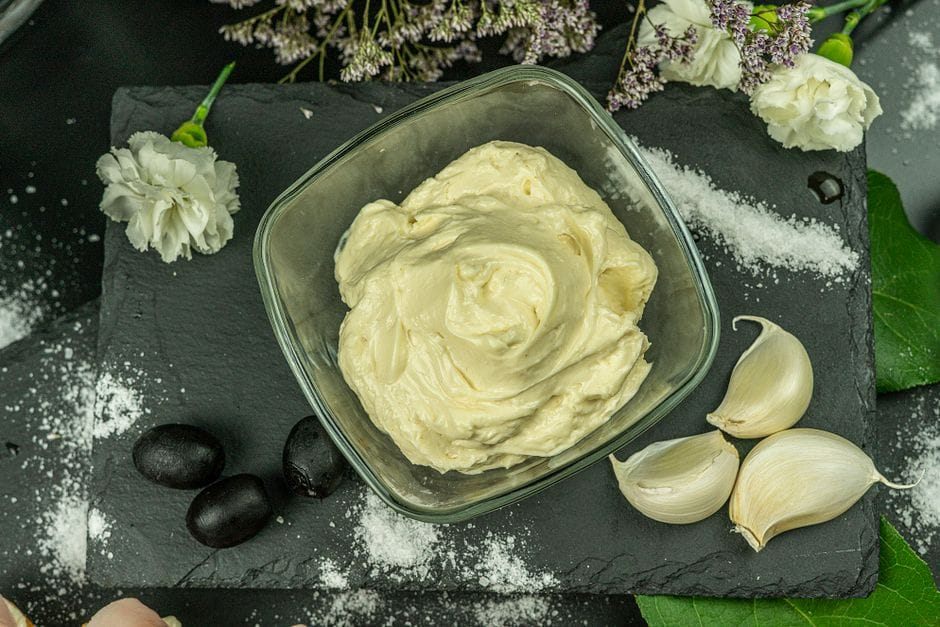
How to get it scoopable, not icy
 Photo: ROMAN ODINTSOV / Pexels
This is the section I wish someone had handed me before that cinderblock pint. Every fix for icy, hard ice cream comes down to managing water, fat, and sugar.
More fat, smaller crystals. If your base keeps freezing icy, the answer is usually more cashews or more coconut cream, full-fat only. The low-fat cans will betray you.
Adding a tablespoon of refined coconut oil to a custard base also helps it freeze slower and softer.
Do not cut the sugar. I know I keep saying it. A tablespoon or two of maple syrup or agave alongside the granulated sugar helps even more, because liquid sugars are especially good at keeping the base soft.
Freeze it cold and fast in a shallow container. A wide, shallow loaf tin freezes faster than a deep tub, and faster freezing means smaller crystals. Chilling the empty container first helps too.
And press parchment or wrap directly onto the surface, which stops a hard frosty skin from forming on top. If you forgot to churn and have no machine, freeze the base in a shallow tin and whisk it hard with a fork every 30 minutes for the first few hours.
It is tedious, but it breaks up the crystals as they form and saves an otherwise icy batch.
One more habit that changed everything for me: store the finished ice cream in the coldest, most stable part of the freezer, near the back, not in the door where the temperature swings every time someone opens it. Those swings melt and refreeze the surface, and that refreezing is exactly what grows the big crunchy crystals you are trying to avoid.
And whatever you do, let a hard pint sit on the counter for 10 to 15 minutes before you go in. Homemade vegan ice cream firms up much harder than store-bought, because it does not have the commercial stabilizers, so a short temper is normal and not a sign you did anything wrong.
Flavor add-ins that actually work
A good base is a blank canvas, and after years of this I have strong opinions about what to fold in and when.
Add cocoa powder or melted dairy-free chocolate to the base before you cook or chill it, so it disperses evenly. A quarter cup of cocoa whisked into the custard gives you a deep chocolate base. Coffee works the same way, stirred in as cooled strong espresso.
My vegan chocolate ganache swirled in at the end makes an incredible fudge ripple.
Fold in chunky add-ins at the very end, after churning or after whipping, never at the start. Chopped toasted nuts, crushed cookies, ribbons of thick fruit jam, broken bits of chocolate. If you fold them in early they sink.
Fresh fruit is the one to be careful with, because raw fruit is mostly water and freezes into hard pebbles. Cook it down into a thick jam first, or use freeze-dried fruit blended to a powder, which adds intense flavor and zero extra water.
Vanilla and most extracts should go in after cooking, off the heat, so their aroma does not cook off.
Is store-bought vegan ice cream actually vegan?
Most of it is, but not all, so this is worth a careful look at the label. The vast majority of plant-based pints are made from oat, coconut, cashew, soy, or almond bases and contain no animal products at all.
The two things that trip people up are honey, which a few "natural" brands use as a sweetener and which is not vegan, and shared-equipment disclaimers, where a brand makes both dairy and non-dairy lines and flags possible cross-contact. The cross-contact note is a manufacturing reality, not an ingredient, so whether it bothers you is a personal call.
The reliable move is to read the ingredient list rather than trusting the front of the carton, since "plant-based" and "dairy-free" are marketing terms, not guarantees, and formulas change. If something on the label looks unfamiliar, you can paste it straight into our vegan ingredient checker, and our growing Is It Vegan database covers specific products as we test them.
For the bigger picture of how plant-based labeling works, the Vegan Society is a solid reference.
The best store brands worth buying
When I do not want to make anything, these are the three I keep coming back to, and they each win at a different thing.
Oatly is my pick for a clean, light oat-milk base. It scoops soft straight from a slightly tempered freezer and does not have a strong coconut flavor, which matters if coconut is not your thing. The Oat Milk Chocolate Fudge is the one I buy on repeat.
If you want to understand the base it is built on, my cashew milk and oat milk guides cover the plant-milk side.
NadaMoo is the coconut-based one I reach for when I want something richer and a little more old-fashioned in texture. It is certified vegan, the coconut flavor is present but not overpowering, and the texture is genuinely creamy rather than icy. Their salted caramel is excellent.
Van Leeuwen is the splurge, and it earns it. It is the richest, most premium-tasting vegan pint I have had, with a dense, slow-melting scoop that comes closest to old-school dairy ice cream.
It is more expensive and higher in fat, which is exactly why it tastes the way it does. I buy it when it is a treat, not a habit.
A few others worth a mention: So Delicious makes a wide, affordable range that is easy to find, and Ben and Jerry's non-dairy line, built on almond or sunflower, is reliably good if you want the familiar chunky style. For more swap ideas across dairy, browse the rest of our vegan substitutes hub.
The bottom line
Vegan ice cream is not hard once you stop fighting the wrong battle. It is not about finding some exotic ingredient. It is about fat and sugar doing their structural jobs so the thing scoops instead of shatters.
Make the cashew-coconut custard when you want the best possible result and have a churner, use the no-churn condensed-coconut method when you want something easy and fluffy with no machine, and never, ever cut the sugar to make it healthier. When you would rather just open a pint, reach for Oatly, NadaMoo, or Van Leeuwen and check the label out of habit.
Now go make a batch, and keep a sturdier spoon than I did.
The recipe
Cashew-Coconut Custard Ice Cream Base
Prep
20 min
Cook
8 min
Makes
about 1 quart (1 L), roughly 6 servings
Ingredients
- 1 cup (140 g) raw cashews, soaked overnight in cold water or 30 minutes in just-boiled water (this is what makes it scoopable, not icy)
- 1 (13.5 oz / 400 ml) can full-fat coconut milk, well shaken (the fat keeps ice crystals small)
- 3/4 cup (150 g) granulated sugar (do not reduce much; sugar is what keeps it soft enough to scoop)
- 2 Tbsp (30 ml) maple syrup or agave (an extra liquid sweetener that lowers the freezing point further)
- 2 Tbsp (16 g) cornstarch or 1 Tbsp arrowroot (the custard thickener that mimics egg yolks)
- 1 Tbsp (15 ml) pure vanilla extract, or seeds from 1 vanilla pod (add after cooking so the flavor stays bright)
- 1/4 tsp fine sea salt (sharpens the sweetness so it does not taste flat)
- 1 Tbsp (14 g) refined coconut oil, optional (extra fat for a richer, slower-melting scoop)
Instructions
- 1 Drain and rinse the soaked cashews, then blend them with the coconut milk and both sweeteners on high for a full 90 seconds, until completely smooth with no grit. Grit is the difference between silky and sandy.
- 2 Whisk the cornstarch with 3 Tbsp of the blended base in a small bowl until there are no lumps, then stir that slurry back into the rest of the base.
- 3 Pour everything into a saucepan and cook over medium heat, whisking constantly, for 6 to 8 minutes until it thickens enough to coat the back of a spoon and a finger drawn through leaves a clean line.
- 4 Take it off the heat. Whisk in the vanilla, salt, and coconut oil if using. Strain through a fine sieve if you want it glass-smooth.
- 5 Press a piece of parchment or plastic wrap directly onto the surface so it does not form a skin, then chill in the fridge for at least 4 hours, ideally overnight. Cold base churns better.
- 6 Churn the fully cold base in your ice cream maker per the machine's instructions, usually 20 to 25 minutes, until it looks like thick soft-serve.
- 7 Scrape into a chilled loaf tin or freezer container, press parchment onto the surface, and freeze for 3 to 4 hours until scoopable.
Notes
- ·No churner? Freeze the chilled base in a shallow tin and whisk it hard every 30 minutes for the first 2 to 3 hours to break up crystals, or use the no-churn method in the body instead.
- ·It firms up hard after a day or two in the freezer. Let it sit on the counter 10 to 15 minutes before scooping.
- ·For chocolate, whisk 1/4 cup cocoa powder into the base before cooking. For fruit, swirl in thick fruit jam after churning, not before.
Calories
250 per 1/2 cup
Protein
3 g
Fat
16 g
Carbs
26 g
Frequently asked questions
Why is my homemade vegan ice cream so hard and icy?+
Two reasons, almost always. Either there is too much water and not enough fat, so the water freezes into coarse crystals, or there is not enough sugar to keep it soft. Fat from full-fat coconut milk or cashews coats the ice crystals and keeps them small, and sugar lowers the freezing point so the base stays scoopable. If yours is rock hard, add more cashews or coconut cream and do not cut the sugar.
Do I need an ice cream maker for vegan ice cream?+
No. The custard method gives the smoothest result with a churner, but the no-churn condensed-coconut method is built for people without one. You whip air into chilled coconut cream, fold in sweetened condensed coconut milk, and freeze it in a loaf tin. The whipped air does the job the churn would normally do, so you still get something soft and scoopable rather than a frozen brick.
Is store-bought vegan ice cream actually vegan, and which brands are best?+
Most plant-based pints are genuinely vegan, but read the label, since a few use honey or are made in shared lines they flag. My go-to brands are Oatly for a clean oat-milk base, NadaMoo for coconut, and Van Leeuwen for the richest scoop. When an ingredient looks unfamiliar, paste the label into our ingredient checker tool to be sure.
Can I make vegan ice cream without coconut if I do not like the flavor?+
Yes. Lean on the cashew custard base, which is naturally neutral and does not taste of coconut at all. Use raw cashews soaked until soft, blended with a little oat or soy milk for body, and let the vanilla and sugar carry the flavor. For the no-churn route without coconut, a thick cashew cream whipped with vegan condensed milk works, though it will not get quite as fluffy.

Written by
VeganDigest Editorial is the small independent team that researches and fact-checks this site. We are not doctors or dietitians. For every is-it-vegan verdict we read the product's current ingredient list and manufacturer information, and for anything health-related we report guidance from recognized bodies such as the NHS, the Vegan Society, and the Academy of Nutrition and Dietetics rather than offering medical advice. Every page shows the date it was last verified, and our full process is on the How We Verify page.
Comments