Vegan Yogurt From Scratch (Thick and Tangy)
- Gluten-free
- Nut-free
- Oil-free
In this guide8
- 01How yogurt actually works (and why this is real fermentation)
- 02Why soy milk makes the thickest yogurt
- 03The culture: your three options
- 04Getting coconut yogurt thick
- 05How to incubate without special equipment
- 06Is store-bought vegan yogurt vegan, and which brands are best
- 07Troubleshooting runny yogurt
- 08The takeaway
The first jar of soy yogurt I made came out so thick that the spoon stood up in it, and I stared at it like I'd performed actual magic. I had not. I'd just stumbled onto the one variable that matters more than any other: the milk.
That batch was made with a plain soy milk whose entire ingredient list read "soybeans, water," and it set into something tangy and dense and genuinely better than the tubs I'd been buying for four dollars apiece.
The batch before that, made with a barista oat milk because it was what I had open, had refused to set into anything firmer than thin soup. I drank it. It was fine.
It was not yogurt.
So that's the headline, and I'll repeat it through this whole guide because it's the thing that trips people up: making vegan yogurt is genuinely easy, but getting it thick depends almost entirely on what you start with. Below is my reliable from-scratch method, an honest breakdown of the cultures, how to handle coconut milk if that's your preference, the store brands actually worth buying, and a proper troubleshooting section for when a batch comes out runny.
How yogurt actually works (and why this is real fermentation)
Yogurt isn't faked tang. Unlike a quick vegan sour cream where you stir in lemon and vinegar to mimic sourness, yogurt is alive. You take a milk, introduce live bacterial cultures, and keep them warm for hours while they do the work.
The bacteria eat the sugars in the milk and produce lactic acid, which is what thickens it and gives it that clean, sharp tang. It's the same process as dairy yogurt, just with a plant milk standing in for the cow's milk.
That means three things have to go right. You need a milk that can set, a culture that's alive and well, and a warm, steady environment for long enough. Get those three right and you almost can't fail.
Get any one of them wrong and you get the soup I drank that first week.
Because it's a real ferment, the cultures need warmth (around 105 to 110F, or 40 to 43C) held steadily for 8 to 12 hours. That's the part people find intimidating, but it's much simpler than it sounds, and I'll show you three ways to do it without any special equipment.
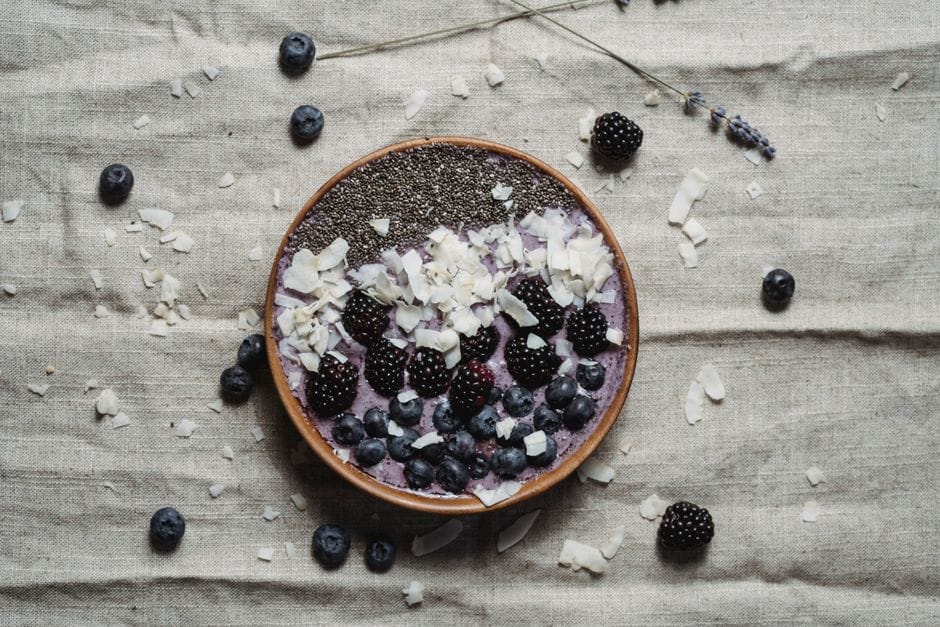
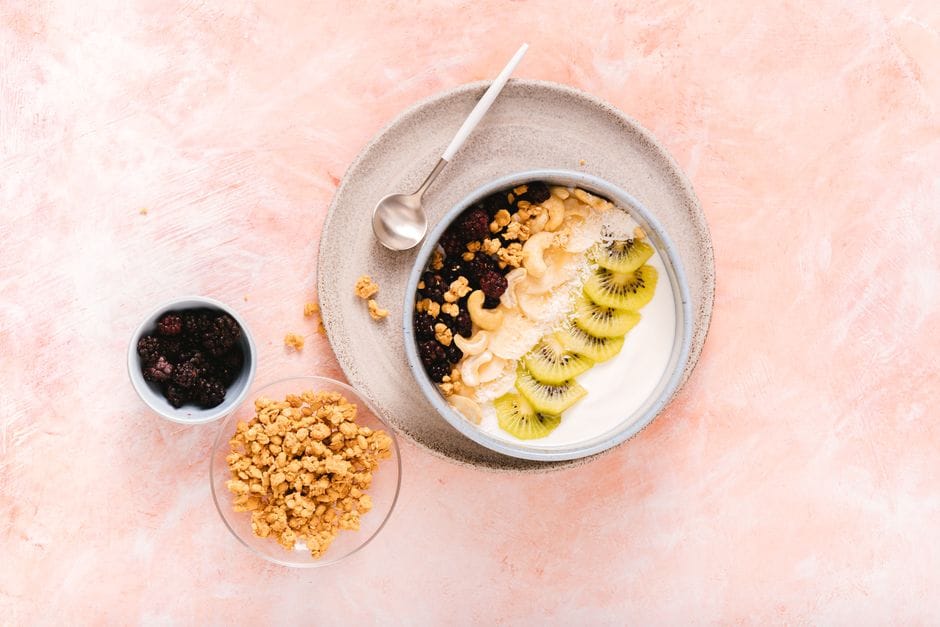
Why soy milk makes the thickest yogurt
 Photo: AI25.Studio Studio / Pexels
If you only take one thing from this article, take this: soy milk sets thicker than any other plant milk, and it's because of protein. Soy has roughly the same protein content as cow's milk, around 7 to 8 grams per cup, and protein is the scaffold that the lactic acid coagulates into a gel.
More protein, firmer set. It's that direct.
But not all soy milk is equal. You want the plainest one you can find, ideally with nothing in it but soybeans and water. The barista and "creamy" versions are loaded with gums, oils, and stabilizers that interfere with a clean set, and many sweetened ones contain additives that the bacteria don't love.
I learned this the hard way, ruining a batch with a gum-thickened carton that turned out gloopy and weird rather than set. Check the label, and if it lists more than soybeans, water, and maybe a pinch of salt, look for a cleaner one.
Coconut milk is the other strong contender, and the one a lot of people prefer for flavor. It's rich, luxurious, and makes a yogurt that feels almost decadent.
The catch is that coconut is mostly fat and water with very little protein, so on its own it won't gel. That's where a thickener comes in, which I'll cover in its own section.
Oat and almond milks, much as I love them for drinking, rarely set into proper yogurt without help. If your heart is set on an oat base, you can read more about working with it in our cashew milk guide, where the same protein-versus-fat logic applies, but honestly, for yogurt, start with soy.
The culture: your three options
The culture is the living engine of the whole thing, and you've got three honest choices.
A dedicated vegan yogurt starter is the most reliable. These are powdered sachets formulated for plant milks, with the right bacterial strains in the right balance. You buy them online or in well-stocked health shops, and they do exactly what they promise.
If you want a guaranteed first batch, start here.
Probiotic capsules are my everyday method and the cheapest if you already keep them around. Open two capsules of a refrigerated, multi-strain probiotic and stir the powder in.
The one rule that matters: avoid any capsule with prebiotic fillers like inulin or FOS, because those turn yogurt slimy and stringy. You want a clean multi-strain blend, nothing fancy added. The label will tell you.
Finally, you can use a few spoonfuls of an existing live vegan yogurt as your starter, exactly the way dairy yogurt-makers have done forever. It has to say "live" or "active cultures" on it, and it has to be plain and unsweetened.
This works beautifully, and you can keep the chain going by saving a clean spoonful from each batch to seed the next. Just know the culture tires after three or four generations and you'll eventually want a fresh source.
Whatever you use, the bacteria are not animal-derived, so any of these keeps your yogurt firmly vegan. If you ever want to double-check a specific probiotic or starter against its ingredient list, run it through the vegan ingredient checker before you buy.
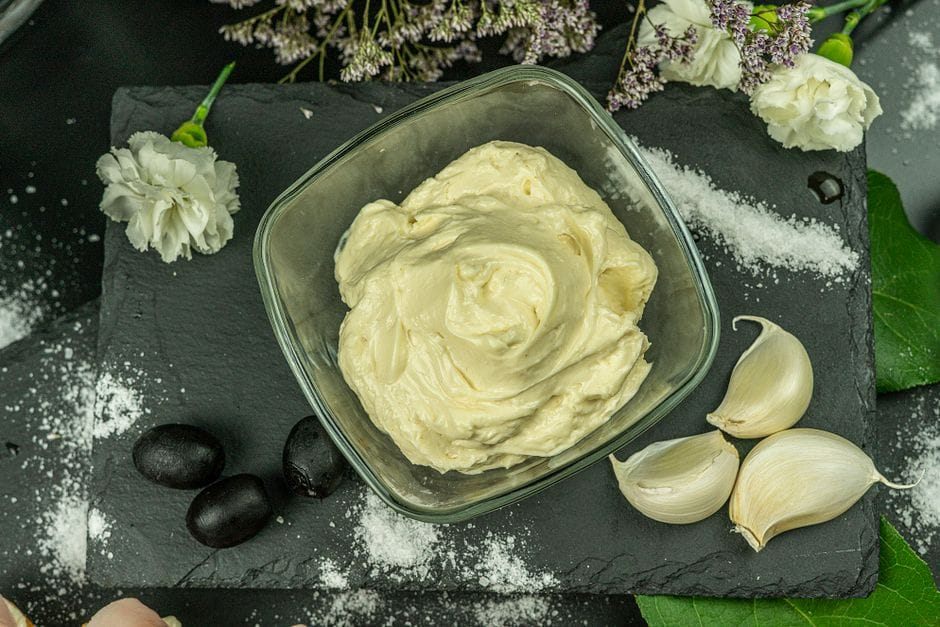
Getting coconut yogurt thick
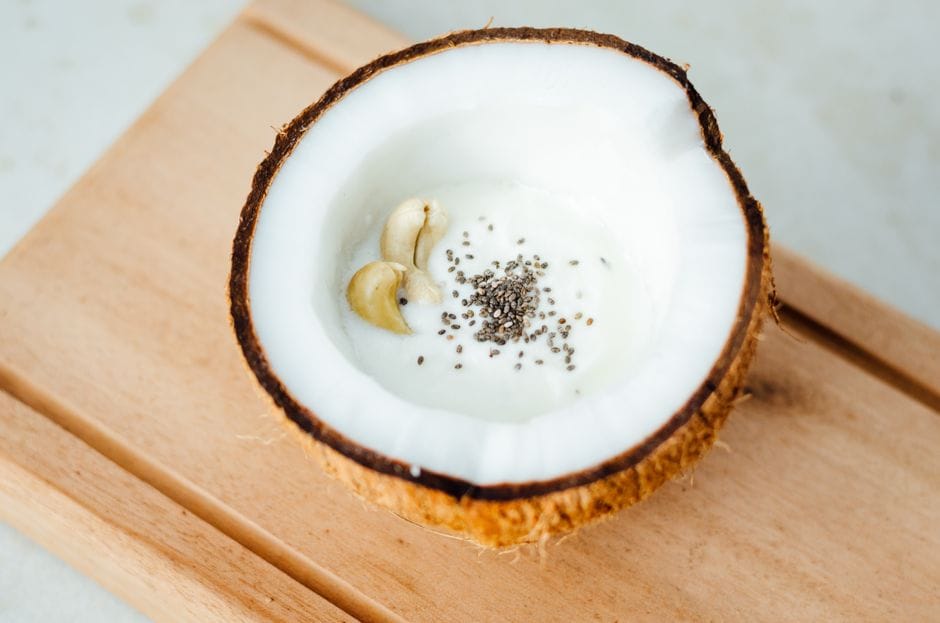 Photo: ray guesc / Pexels
I don't want to talk you out of coconut, because when it's done right it's gorgeous. But you have to help it set, and there are two routes.
The easy one is tapioca starch. Whisk a tablespoon or two into the cold coconut milk before you heat it, then heat and cool as usual. The starch gels as it cooks and gives the finished yogurt body and a smooth, pudding-like thickness. This is the most forgiving method and the one I reach for most.
The firmer route is agar agar, a seaweed-derived gelling agent that's the vegan answer to gelatin. A quarter teaspoon of agar powder whisked into the milk and brought to a boil before cooling will set coconut yogurt into something almost sliceable.
It's a stronger, more definite set, sometimes a touch too firm, so go light and adjust to taste. Agar needs to actually boil to activate, unlike tapioca, so don't skip that step.
Both thickeners go in before you add the culture, never after. And remember the culture still needs to be added at 110F, not boiling, so cool the milk down after activating the agar.
The fat in coconut means coconut yogurt is naturally richer and more filling than soy, so I tend to make smaller batches of it and treat it as the indulgent option.
How to incubate without special equipment
You do not need a yogurt maker, though they're cheap and lovely if you make yogurt weekly. The goal is simply to hold the inoculated milk at 105 to 110F (40 to 43C) for 8 to 12 hours. Here's how I've done it in real kitchens.
The oven-light method. Many ovens stay at roughly the right temperature with just the interior light on and the door shut. Pop your jar in, leave the light on, and check the temperature with a thermometer the first time so you know your oven runs warm enough. This is my default.
The cooler method. Fill a small cooler or insulated bag with a couple of jars of hot (not boiling) water, nestle your yogurt jar in alongside them, and close the lid. The insulation holds the warmth for hours. Swap the water jars once partway through a long incubation if your kitchen is cold.
A yogurt maker or Instant Pot. If you have either, use it. The Instant Pot's yogurt function holds a perfect steady temperature and takes the guesswork out entirely. A standalone yogurt maker does the same.
For the price, they're worth it if you've caught the bug.
The longer you incubate, the thicker and tangier the result, up to a point. Eight hours gives a mild, soft-set yogurt; twelve gives a firm, sharp one. I check at eight, then decide.
The bacterial fermentation that's happening is exactly the same chemistry whether the milk is plant or dairy, so the timing logic carries straight over from any dairy yogurt recipe you've seen.
Is store-bought vegan yogurt vegan, and which brands are best
Short answer: yes, anything sold as a plant-based or non-dairy yogurt is vegan, because the base is a plant milk and the cultures aren't animal-derived. The only thing I ever glance at is added vitamin D, which is usually the vegan D2 form on plant yogurts but can occasionally be animal-derived D3.
If you want certainty on a specific tub, the fastest move is to look the brand up in our Is It Vegan database or scan the label.
Now, the brands I actually keep in my fridge for the weeks I don't make my own.
Cocojune is my top pick when I want something rich. It's a coconut-based, organic, cultured yogurt with a thick, luxurious texture and a proper cultured tang rather than just sweetness. Their plain is genuinely excellent, and it's the one I serve to dairy-eaters who then ask where I bought it.
Forager Project makes a cashew-and-coconut based yogurt that's thick, clean-tasting, and reliably tangy. It's organic and the texture holds a spoon well. If you've liked their dairy-free sour cream, you'll know the house style: properly cultured, not cloying.
A great all-rounder.
Silk is the widely available, affordable workhorse. Their range spans soy, almond, and coconut bases, so read the specific tub, but the soy line in particular sets up satisfyingly thick thanks to that protein content I keep harping on. It's the one you'll find in almost any supermarket, and it's a solid, honest product for the price.
One honesty note: formulations and which exact base a brand uses can shift over time, so if a label looks different from what you remember, trust the current ingredient list over your memory.
Troubleshooting runny yogurt
This is the section to bookmark, because runny yogurt is the single most common complaint, and it's almost always fixable. Work down this list.
Your milk was too low in protein. This is the big one. Coconut, oat, and almond milks lack the protein to set firmly on their own. If you used one of these without a thickener, that's your answer: switch to plain soy milk, or add tapioca or agar.
A protein-rich, additive-free soy milk fixes more runny batches than anything else.
Your culture was dead or too old. Probiotics and starters lose potency past their date or if they got warm in transit. If your milk was perfect but nothing fermented, the culture likely wasn't alive. Start fresh with a new source, and store probiotics in the fridge.
The temperature drifted. Too hot at inoculation (above 115F) kills the bacteria outright; too cool during incubation (below 100F) and they barely work. A cheap thermometer is the cure. Check the milk before adding the culture, and check your incubation spot the first time you use it.
You didn't give it long enough. A thin set at eight hours often just needs more time. Tuck it back into the warmth for another two to four hours and check again.
And the universal rescue, when all else fails: strain it. Line a sieve with cheesecloth, pour in the yogurt, and let it drain in the fridge for a couple of hours. You'll lose some volume to the whey, but whatever set will instantly thicken into something dense and Greek-style.
I've turned more than one disappointing batch into a triumphant one this way. Drained even longer, it firms up enough to use like a vegan cream cheese on toast.
The takeaway
Vegan yogurt is one of the most satisfying things to make at home, and it comes down to three things done right: start with a high-protein, additive-free soy milk if you want it thick, use a live culture you trust, and hold it warm and steady for 8 to 12 hours. Coconut is the richer option if you don't mind adding a thickener, and a quick strain through cheesecloth rescues almost any runny batch.
Keep a tub of Cocojune or Silk in the fridge for the busy weeks, but try a batch from scratch at least once. When you lift the spoon out of your own jar and it stands up on its own, thick and tangy and made from nothing but soybeans and bacteria, you'll understand why I got so absurdly excited over that first one.
It's just yogurt, and it happens to be vegan.
The recipe
Thick and Tangy Homemade Soy Yogurt
Prep
15 min
Cook
10 min
Makes
about 4 cups (1 liter), plus the 8 to 12 hour incubation
Ingredients
- 4 cups (1 liter) unsweetened soy milk, ideally the kind whose only ingredients are soybeans and water (the protein is what sets the yogurt)
- 1 vegan yogurt starter sachet, OR 2 multi-strain probiotic capsules opened, OR 3 Tbsp live unsweetened plant yogurt (your culture, see notes)
- 1 tsp cane sugar (optional, a little food for the cultures that speeds fermentation, mostly consumed during incubation)
- 1 to 2 Tbsp tapioca starch (only if using coconut milk; whisk in cold before heating to thicken, soy usually needs none)
- 1/4 tsp agar agar powder (alternative coconut thickener for a firmer, sliceable set)
- 1 pinch fine sea salt (optional, rounds out the flavor and sharpens the tang)
- 1 to 2 Tbsp maple syrup or other sweetener (optional, for stirring in after culturing, never before)
- 1/2 tsp vanilla bean paste or alcohol-free vanilla (optional, for serving; skip standard extract, which is alcohol-based)
Instructions
- 1 Sterilize your jar and any utensils with boiling water and let them air dry. Stray bacteria are the enemy of a clean set.
- 2 Pour the soy milk into a saucepan. If using coconut milk, whisk the tapioca starch or agar into the cold milk now.
- 3 Heat the milk gently to about 180F (82C), stirring so it doesn't scorch, then hold it there for a minute or two. This denatures the proteins so they set into a firmer gel.
- 4 Cool the milk to 110F (43C). It should feel warm but not hot on your wrist. Too hot kills the culture; too cool and it won't activate.
- 5 Whisk in the sugar if using, then stir in your starter until fully dissolved. Avoid lumps so the culture spreads evenly.
- 6 Pour into your sterilized jar, cover loosely, and incubate at a steady 105 to 110F (40 to 43C) for 8 to 12 hours. Use a yogurt maker, an oven with the light on, or a cooler with a jar of warm water.
- 7 Check at 8 hours. When it's set, jiggles like a custard, and tastes pleasantly tangy, it's done. Longer means thicker and sharper.
- 8 Refrigerate at least 4 hours before eating. It firms up considerably as it chills. Stir in sweetener or vanilla only after culturing, never before.
Notes
- ·Culture options: a powdered vegan yogurt starter is the most reliable. Probiotic capsules must be multi-strain with no prebiotic fillers like inulin, which turns yogurt slimy. Live yogurt from a previous batch works for three or four generations before the culture tires out.
- ·Greek-style: line a sieve with cheesecloth and let the finished yogurt drain in the fridge for 2 to 4 hours. You'll lose volume but gain a thick, spoon-standing texture. The drained liquid is whey, fine to discard.
- ·Soy sets thickest because of its high protein. Coconut is richer and more luxurious but needs tapioca or agar to firm up. Oat and almond rarely set well alone and are best strained.
Calories
90 per 1/2 cup (soy version)
Protein
6 g
Fat
4 g
Carbs
5 g
Frequently asked questions
Is store-bought vegan yogurt actually vegan?+
Anything sold as plant-based or non-dairy yogurt is vegan, since the base is soy, coconut, oat, or almond rather than cow's milk. The cultures used are bacterial strains that don't come from animals. The one thing worth a glance is added vitamin D, which can occasionally be the animal-derived D3 form, though most plant yogurts use vegan D2. Scan the label if you want to be sure.
Why is my homemade vegan yogurt runny instead of thick?+
Runny yogurt almost always comes down to one of four things: a milk too low in protein to set (most coconut and oat milks), a culture that was dead or too old, an incubation temperature that drifted too cool, or simply not enough time. Soy milk with no gums or stabilizers sets thickest. If your milk just won't firm up, strain the finished yogurt through cheesecloth to thicken it the easy way.
What can I use as a starter culture for vegan yogurt?+
You have three good options. A dedicated vegan yogurt starter (powdered, sold for plant milks) is the most reliable. Refrigerated probiotic capsules work well if you pick a multi-strain blend with no prebiotic fillers like inulin, which can make yogurt slimy. Or you can use a few spoonfuls of an existing live vegan yogurt as your starter, the same way dairy yogurt-makers do.
How long does homemade vegan yogurt last in the fridge?+
About 7 to 10 days in a sealed jar, and it actually gets tangier and thicker over the first couple of days. Always use a clean spoon to avoid introducing stray bacteria. If you want to make a fresh batch, save a few clean spoonfuls of this one to use as the starter, though after three or four generations the culture weakens and you'll want a fresh source.

Written by
VeganDigest Editorial is the small independent team that researches and fact-checks this site. We are not doctors or dietitians. For every is-it-vegan verdict we read the product's current ingredient list and manufacturer information, and for anything health-related we report guidance from recognized bodies such as the NHS, the Vegan Society, and the Academy of Nutrition and Dietetics rather than offering medical advice. Every page shows the date it was last verified, and our full process is on the How We Verify page.
Comments