How to Cook Beans in an Instant Pot (No Soaking Needed)
 Jump to recipe ↓
 In this guide8
- 01Why the Instant Pot beats the stovetop for beans
- 02The no-soak method, start to finish
- 03Pressure-cook times for every bean
- 04Why kidney beans need real care
- 05When to add salt, and the myth to ignore
- 06Natural release versus quick release
- 07Save the cooking liquid, do not pour it away
- 08My standard weeknight batch
The first time I cooked beans in an Instant Pot I did everything the box told me not to. No soak, a heaping cup of dried pintos, water sloshed in by eye, and a lid I was half convinced would launch across the kitchen.
Forty minutes later I opened the pot to beans so creamy they collapsed under a spoon, no babysitting, no two-hour simmer, no soaking bowl taking up the counter overnight. I have not bought a can of beans on purpose since.
That is the real pitch for pressure-cooked beans, and the reason I want to walk you through it properly. Dried beans are the cheapest serious protein in the store, often under a dollar a pound, and an Instant Pot turns the one annoying thing about them, the cooking time, into a hands-off forty minutes.
This is the no-soak method I actually use, with exact times for the five beans I cook most, the kidney bean safety note that genuinely matters, and the bit almost everyone throws away by accident.
Why the Instant Pot beats the stovetop for beans
I still love a pot of beans simmering on the stove, but for a weeknight the Instant Pot wins on almost every count. The sealed chamber holds steam at high pressure, which pushes the boiling point up past 240F instead of the usual 212F.
Hotter water means beans soften far faster, and it means you can skip the soak entirely without the cook time ballooning past two hours the way it does on the stove.
It is also forgiving in a way the stove is not. No water boiling off, no scorched layer stuck to the bottom, no lid to lift and stir. You set it, walk away, and come back to dinner.
The texture is different too, more uniformly creamy, because every bean cooks at the same temperature in the same liquid for the same time.
The trade-off is that you cannot taste as you go. Once the lid is on, you are committed to a time, so the times below matter more than they would on the stove. The good news is dried beans are predictable once you know the number for each kind.
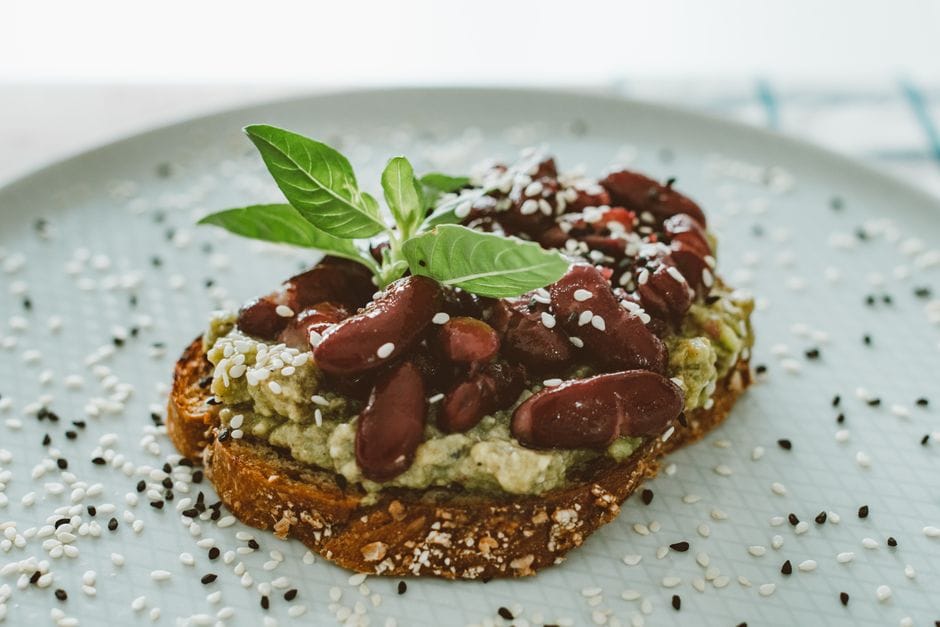
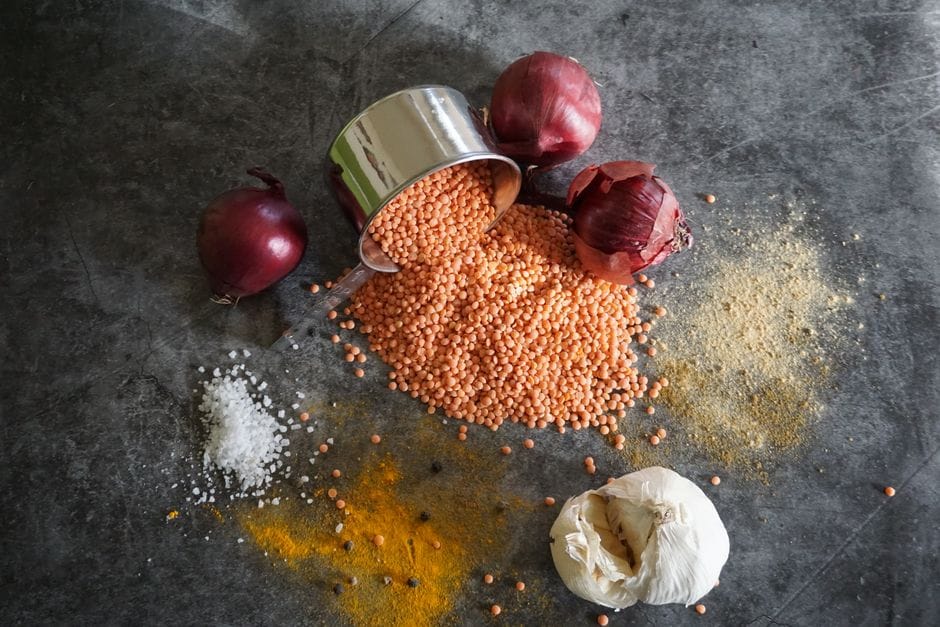
The no-soak method, start to finish
 Photo: Ernesto Rosas / Pexels
Here is the routine I run for any bean, before we get into the specific times. It takes two minutes of actual work.
Rinse one pound of dried beans, roughly two cups, in a colander and pick out any stones or shriveled duds. Tip them into the Instant Pot.
Add water until the beans are covered by about two inches, which is usually six to eight cups, since unsoaked beans drink up a lot. Add a glug of neutral oil, around a tablespoon, to cut the foaming that can clog the valve, plus any aromatics you like: half an onion, a few smashed garlic cloves, a bay leaf.
Do not salt yet, and we will get to why. Lock the lid, set the valve to sealing, and cook on high pressure for the time below. When it finishes, let the pressure come down on its own.
Then taste a bean, and only then reach for the salt.
That is genuinely it. The pot does the rest. If you want the longer stovetop comparison and a deeper dive on soaking, I put that in the full guide to cooking dried beans, but for the Instant Pot you can stay right here.
Pressure-cook times for every bean
These are high-pressure times for one pound of dried beans with a natural release. The first number is for unsoaked beans straight from the bag, the second is for soaked beans if you happened to plan ahead.
Times assume reasonably fresh beans, because age is the single biggest variable. A bag that has sat in a pantry for two years will laugh at any timer.
Black beans: 25 minutes unsoaked, 8 to 10 minutes soaked. These are the most reliable bean in the pot and a great place to start.
Pinto beans: 25 to 28 minutes unsoaked, 8 to 10 minutes soaked. They turn beautifully soft and a little broken, ideal for refried beans.
Chickpeas: 40 to 45 minutes unsoaked, 12 to 15 minutes soaked. The toughest of the bunch and the one I most often soak, though no-soak works if you give it the full time. For everything chickpea-specific, including aquafaba and baking soda, see my chickpea cooking guide.
Kidney beans: 30 to 35 minutes unsoaked, 12 to 15 minutes soaked. Read the safety section below before you cook these, it is short and it is important.
Cannellini beans: 30 to 35 minutes unsoaked, 10 to 12 minutes soaked. White beans split easily, so err toward the lower end if you want them whole for a salad.
If your beans come out a touch firm, do not panic. Lock the lid back on and run another five minutes at pressure, then natural release again. Underdone beans are an easy fix.
Overdone, mushy beans are not, which is why I always aim slightly low on a new bag and add time rather than start too high.
Why kidney beans need real care
 Photo: Marina Leonova / Pexels
This is the one part of bean cooking I never wave off, because it is a genuine food safety issue rather than a texture preference. Raw and undercooked red kidney beans contain a lectin called phytohaemagglutinin, and eating beans that are still crunchy in the center can cause sharp nausea and stomach upset within a few hours.
As few as four or five badly undercooked beans have done it to people.
The reassuring part is that heat destroys it completely. The catch is that the heat has to be high enough. A slow cooker set to low does not get there, which is the classic way people accidentally poison themselves with kidney beans.
An Instant Pot at high pressure runs well above boiling, so it deactivates the toxin without any trouble as long as the beans actually cook through to soft. The FDA Bad Bug Book covers this if you want the primary source.
So with kidney beans, never serve them firm or al dente, and never use the leftover cooking liquid from an undercooked batch. Cook them fully, confirm a bean mashes easily between two fingers, and you have nothing to worry about.
I treat the lower end of their time range as a starting point and happily add five minutes rather than cut it close.
When to add salt, and the myth to ignore
You have probably heard that salting beans before they cook makes them tough and keeps them from softening. I believed it for years. It turns out to be mostly wrong.
Salt in the cooking water actually helps the skins soften and seasons the bean from the inside, and a moderate amount, around a teaspoon per pound, does no harm at all.
So why do I still tell people to salt at the end? Because timing the salt to the end removes a variable. When beans refuse to soften, the real culprit is almost always old beans or hard, mineral-heavy water, not salt.
But if you salted early, salt is the first thing you blame, and you waste a perfectly good method chasing a ghost. Cook them plain, get them tender, then salt and let them rest ten minutes to drink it in, and your beans will be seasoned through without any guesswork.
The thing that genuinely does fight softening is acid. Tomatoes, lemon, vinegar, anything sharp added before the beans are tender will keep them firm for a long, long time. Add acidic ingredients only after the beans are fully cooked.
If you are building a chili or a tomato-based stew, cook the beans first, then introduce the tomato.
Natural release versus quick release
The release method is not a detail, it changes how your beans come out. After the cook time ends, you have two choices.
Natural release means you leave the pot alone and let the pressure fall on its own, which takes anywhere from 15 to 25 minutes for a full pot of beans. The beans keep cooking gently as the pressure drops, and they stay whole because nothing jostles them.
For beans, this is almost always what you want. It is the difference between intact beans and a pot of split skins.
Quick release means you flip the valve and let the steam blast out fast. It is great for vegetables you want to stop cooking, but for beans it does two bad things: the violent boil thrashes the beans apart, and the foamy bean liquid can spit up through the valve and make a mess.
With starchy beans you risk sputtering hot liquid across your hand and your stove.
My rule is simple. Beans get a full natural release every time. If I am impatient, I do a natural release for at least 15 minutes and only then crack the valve to vent whatever pressure is left, gently.
A hard quick release straight off the timer is the fastest way to turn nice beans into bean soup you did not order.
Save the cooking liquid, do not pour it away
The biggest waste I see is dumping the murky liquid left in the pot down the drain. That cloudy, starchy water is one of the most useful free ingredients in a vegan kitchen, and you already made it.
That liquid is loaded with the starch and dissolved flavor that cooked out of the beans, which means it thickens things beautifully. Ladle some back into a pot of beans to make them saucy. Stir it into soups and stews instead of plain water for instant body.
Use it to loosen hummus or a bean dip to a silky consistency without thinning the flavor. The liquid from chickpeas has its own name, aquafaba, and whips into peaks like egg white for vegan meringue and mayo, which I get into in the chickpea guide.
Let it cool, pour it into a clean jar, and it keeps in the fridge for about four days. It also freezes well, so I portion it into an ice cube tray and keep the cubes in a bag for whenever a sauce needs thickening.
One caveat: if you salted the beans heavily, the liquid concentrates that salt, so taste before you commit a cup of it to a recipe. And as I said above, never save the liquid from kidney beans unless they were fully cooked.
If you are folding a batch of beans into a packaged sauce or boxed broth, it is worth a quick check that the rest of the ingredients are actually plant-based, since simmer sauces and stocks sneak in surprises. I run anything questionable through the vegan ingredient checker or look the brand up in the Is It Vegan database before it goes near my pot.
My standard weeknight batch
To pull it all together, here is what I do most Sundays, batch-cooked for the week ahead. One pound of black beans, rinsed, no soak. Into the pot with eight cups of water, a tablespoon of oil, half an onion, two garlic cloves, and a bay leaf.
High pressure, 25 minutes, full natural release. I fish out the onion and bay, salt the beans, and let them sit ten minutes.
That gives me about six cups of cooked beans plus a jar of liquid, all for under a dollar of beans and almost no attention. They go into tacos, grain bowls, soups, and a quick mash on toast through the week.
If batch cooking like this is your thing, I lean on it hard in my vegan meal prep guide, where beans are the backbone of half the plan.
Once you have the times memorized, beans stop being a project and become the thing you throw together while the rest of dinner happens. No soaking bowl, no scorched pot, no canned-bean mush.
Just cheap, creamy, properly cooked beans, with a jar of liquid gold you used to throw away. Get the number right for your bean, give it a natural release, and salt at the end. That is the whole game.
The recipe
Instant Pot Black Beans (No Soaking)
Prep
2 min
Cook
40 min
Makes
about 6 cups cooked beans (6 servings)
Ingredients
- 1 pound (about 2 cups) dried black beans
- 8 cups water
- 1 tablespoon neutral oil
- 1/2 medium onion
- 2 garlic cloves, smashed
- 1 bay leaf
- Salt, to taste (added after cooking)
Instructions
- 1 Rinse the dried black beans in a colander and pick out any stones or shriveled beans.
- 2 Tip the rinsed beans into the Instant Pot.
- 3 Add 8 cups of water, the tablespoon of oil, the half onion, the smashed garlic cloves, and the bay leaf. Do not add salt yet.
- 4 Lock the lid, set the valve to sealing, and cook on high pressure for 25 minutes.
- 5 When the cook time ends, let the pressure release naturally (15 to 25 minutes). Do not use quick release.
- 6 Remove and discard the onion and bay leaf.
- 7 Taste a bean to confirm it is fully tender and mashes easily. If still firm, lock the lid and cook on high pressure for another 5 minutes with a full natural release.
- 8 Add salt to taste and let the beans sit for 10 minutes to absorb the seasoning.
- 9 Reserve the cooking liquid in a jar for up to 4 days in the refrigerator, or freeze in portions.
Notes
- ·For unsoaked pinto beans use 25 to 28 minutes; chickpeas 40 to 45 minutes; kidney beans 30 to 35 minutes; cannellini beans 30 to 35 minutes.
- ·Kidney beans must be cooked fully soft. Never serve them firm as undercooked kidney beans contain phytohaemagglutinin, a toxin destroyed by high heat.
- ·Add acidic ingredients such as tomatoes, lemon, or vinegar only after the beans are fully cooked, as acid prevents softening.
- ·The cloudy cooking liquid is rich in starch and flavor. Use it to thicken soups, loosen hummus, or add body to sauces. Chickpea cooking liquid (aquafaba) can be whipped like egg white.
- ·Bean age is the biggest variable. Old beans may need extra time regardless of the timer.
Frequently asked questions
Do I really not need to soak beans for the Instant Pot?+
No, you can cook every common dried bean straight from the bag in an Instant Pot. Skipping the soak just adds time at pressure, usually somewhere between 10 and 20 extra minutes depending on the bean. The one real benefit of soaking is gentler digestion and a slightly more even texture, but plenty of cooks, myself included, run unsoaked beans every week without trouble.
Why do kidney beans need special care?+
Raw and undercooked red kidney beans contain a natural compound called phytohaemagglutinin that can make you genuinely sick, and a slow cooker on low does not reach a high enough temperature to destroy it. An Instant Pot at high pressure runs well above boiling, so it deactivates the toxin reliably as long as the beans cook fully through and are not left crunchy in the middle.
When should I add salt to Instant Pot beans?+
Add it after the beans are tender, not before. Salting the soaking or cooking water is fine for flavor and will not stop beans from softening, despite the old myth, but the most foolproof habit is to cook them plain, then stir salt in once they are done and let them sit for ten minutes to absorb it. That way a stubborn old bag of beans never gets blamed on the salt.
Should I keep the bean cooking liquid?+
Yes, the starchy liquid left in the pot is one of the best free ingredients in vegan cooking. It thickens soups and stews, loosens hummus, and the liquid from chickpeas is aquafaba, which whips like egg white. Cool it, store it in a jar in the fridge for up to four days, or freeze it in portions. Just go easy if you salted the beans heavily, since it concentrates.

Written by
VeganDigest Editorial is the small independent team that researches and fact-checks this site. We are not doctors or dietitians. For every is-it-vegan verdict we read the product's current ingredient list and manufacturer information, and for anything health-related we report guidance from recognized bodies such as the NHS, the Vegan Society, and the Academy of Nutrition and Dietetics rather than offering medical advice. Every page shows the date it was last verified, and our full process is on the How We Verify page.
Comments