How to Caramelize Onions (Slow and Properly)
In this guide9
The first time I tried to caramelize onions, I followed a recipe that promised soft, sweet, golden onions in ten minutes. I cranked the heat, stirred like mad, and ended up with onions that were brown on the edges, crunchy in the middle, and sharp enough to make my eyes water.
They were not caramelized. They were rushed, burnt-edged, raw-centered onions pretending to be the real thing.
It took me years to accept the truth that every patient cook eventually learns: there is no ten-minute shortcut. Caramelized onions take time, and the time is the whole point.
What you are doing across those 40 minutes is coaxing out the natural sugars locked inside the onion and letting them brown slowly into something jammy, deep, and almost sweet enough to eat with a spoon. Here is exactly how I do it now, and why every step matters.
What caramelizing actually means
Caramelizing is not the same as frying or sauteing. When you saute onions for a few minutes, you soften them and maybe catch a little color. Caramelizing is a slow chemical transformation.
As the onions sit over gentle heat, two things happen. First, the water inside them cooks off. Second, once they are dry enough and hot enough, the sugars and amino acids start to brown.
That browning is the Maillard reaction plus genuine sugar caramelization, the same family of chemistry that gives toast, roasted vegetables, and seared crusts their flavor. It only happens at a steady, moderate temperature and only after the moisture is gone.
Rush the heat and you scorch the outside before the inside has dried out. That is the entire reason fast caramelized onions never taste right.
A raw onion is roughly 89 percent water by weight. All of that has to leave the pan before real browning can begin, and water does not evaporate instantly. That single fact explains why patience is not optional here.
What you need
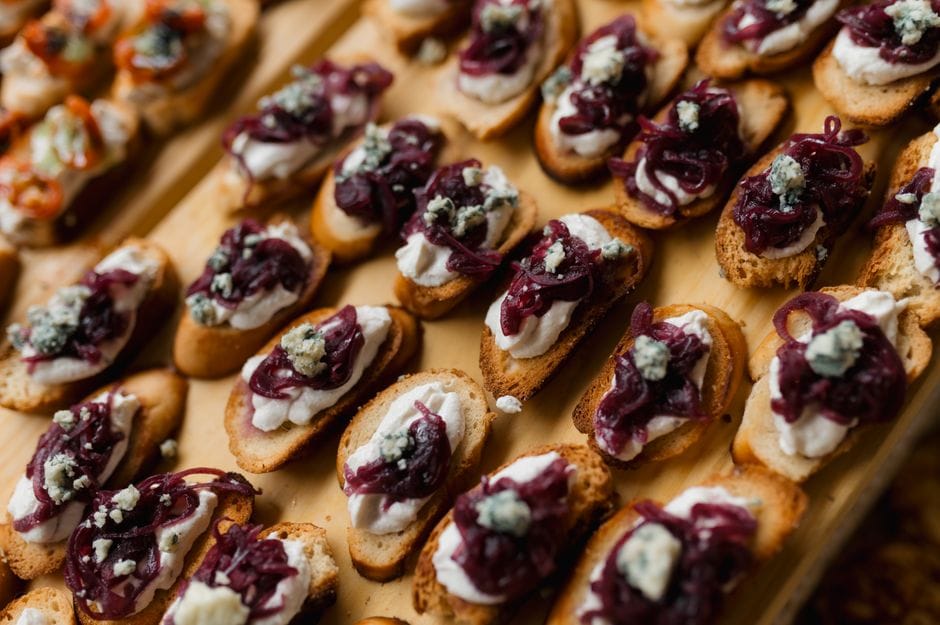 Photo: Jonathan Borba / Pexels
You do not need anything fancy, but a few choices make a real difference.
- Onions. Yellow onions are my default because they have the best balance of sugar and sharpness. Red onions work and turn a gorgeous deep color. Sweet onions like Vidalia caramelize fast but can go almost too sweet. Plan for serious shrinkage: two large onions cook down to maybe half a cup.
- Fat. I usually reach for vegan butter because it browns beautifully and adds a richness that carries the onions further. Neutral oil works fine too, and a mix of the two gives you the flavor of butter with a higher smoke point. Use about two tablespoons of fat per two large onions.
- A heavy pan. Cast iron or a thick stainless skillet holds heat evenly. Thin nonstick pans develop hot spots and tempt you to crank the heat, which is exactly what you do not want.
- A wooden spoon and a little patience. That is genuinely it.
If you ever wonder whether a particular stick of plant butter is fully vegan, you can run the label through our vegan ingredient checker before it goes in the cart.
The method, step by step
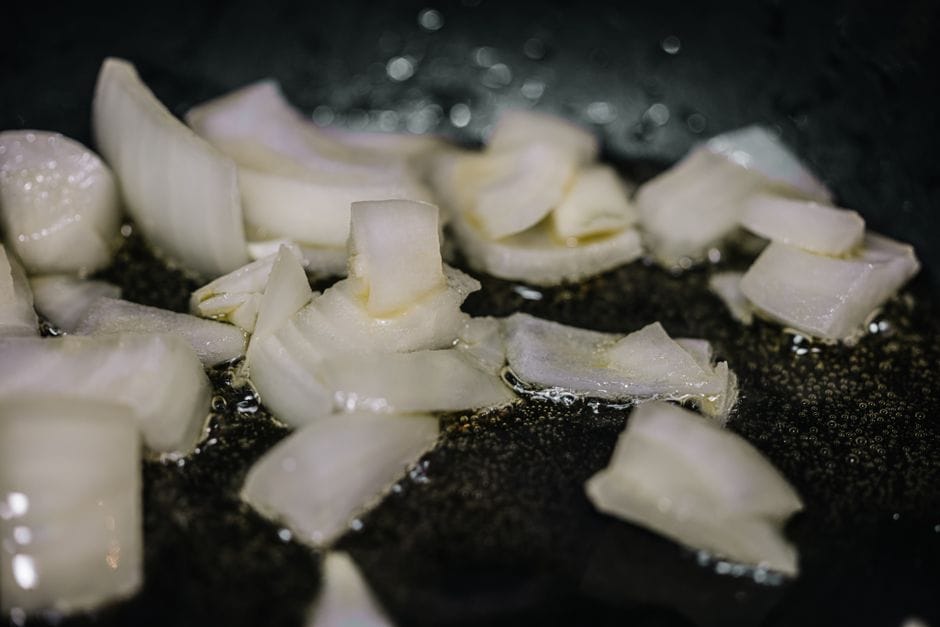
Slice your onions root to tip, not in rings, into even slices about a quarter inch thick. Even slices matter more than thin ones, because uneven pieces brown at different rates and the thin shreds burn while the thick ones are still raw.
Melt the fat in your pan over medium heat until it shimmers. Add the onions and a small pinch of salt, and toss to coat. They will pile up high and look like far too many.
They are not. Give them a few minutes over medium heat to start releasing their water and collapsing down, stirring now and then.
Once they have softened and slumped, this is the critical move: turn the heat down to medium-low or low. From here on, you are in it for the long haul, roughly 35 to 45 more minutes. Stir every few minutes, scraping the bottom of the pan.
You are looking for slow, even color change from white to pale gold to deep amber. There is no stirring constantly required, but do not wander off either.
The color will creep up on you. For the first 15 minutes, almost nothing dramatic happens and you will be tempted to raise the heat. Resist.
Around the 20 minute mark they turn pale gold, by 30 they are properly golden, and somewhere past 40 they go to that deep brown, jammy stage where they almost melt together. That last stretch is where the magic lives, so do not stop early.
The deglaze trick
 Photo: Anna Tarazevich / Pexels
Here is the technique that took my onions from good to genuinely great. As they cook, a brown film builds up on the bottom of the pan. That sticky brown layer is called fond, and it is pure concentrated onion flavor.
If you leave it, it will eventually darken and turn bitter. So you lift it back into the onions.
Every so often, when the bottom starts looking dark and dry, add a splash of water or vegetable broth, a tablespoon or two, and scrape the pan with your spoon. The liquid loosens the fond, dissolves it, and you stir all that flavor back into the onions.
The water then cooks off again and the process repeats. I deglaze maybe three or four times across a batch.
This is also your burn insurance. The moment the pan looks like it is getting too dark too fast, a splash of water cools it and buys you time. Plain water is all you need.
A little broth deepens the savory note, and a few drops of balsamic vinegar stirred in near the very end adds a lovely tang and sheen, though that is a finishing touch rather than a deglaze. There is no need for wine or any other alcohol here, despite what a lot of classic recipes will tell you.
Water and broth do the job perfectly.
Salt and heat: getting the timing right
Salt timing is one of those things cooks argue about, so let me tell you what actually happens in the pan. Salt draws water out of the onions through osmosis.
Add it early and the onions release their moisture faster, soften sooner, and are less likely to catch and scorch in those first vulnerable minutes. That is why I add a small pinch at the start.
The catch is that early salt speeds the whole thing up, so it is not a license to walk away. Keep the heat gentle.
I do my main seasoning at the end, once the onions have shrunk to a fraction of their volume and the flavor has concentrated, because it is far easier to judge salt on the finished thing than to guess at the start.
On heat: low and slow beats fast and hot every single time. The biggest mistake I see, and the one I made for years, is using too high a heat to save time.
High heat scorches the outsides into bitter black flecks while the centers stay raw and oniony. If your onions look done in 15 minutes, they are not caramelized, they are just browned. Medium-low is the sweet spot.
If you have to leave the kitchen, turn the heat off entirely rather than risk it.
Here is what failed when I rushed it
A few honest mistakes from my own pans, so you can skip them.
I once tried to caramelize a double batch crammed into one skillet. Piled that deep, the bottom layer steamed instead of browning, and 40 minutes in they were still pale and wet. Use a wide pan, or cook in two batches, so the onions have room to lose their water.
Another time I got impatient and bumped the heat to high for the last ten minutes to hurry the color along. I got color, all right, the bitter, acrid kind, with black specks stuck to the pan. There is no fast-forward button.
The slow part is the recipe.
And early on I would forget to deglaze, let the fond go black, and then wonder why a faint bitterness ran through the whole batch. Lift that fond before it burns and the flavor stays clean and sweet.
What to do with them
This is the fun part, because properly caramelized onions make almost anything taste like you tried harder.
French onion soup is the obvious home for them. A pot of dark, jammy onions simmered in good vegetable broth, ladled over toasted bread and a blanket of melty cheese, is one of the great comfort foods.
Build your broth from a homemade base if you can, and a sprinkle of vegan parmesan over the top before it goes under the broiler adds a salty, savory crust that pulls the whole bowl together.
Burgers and sandwiches are transformed by a generous tangle of these onions. Pile them on a bean or grain patty and the sweetness balances the savory in a way ketchup never manages.
Dips might be my favorite use. Fold caramelized onions into a base of vegan sour cream or a thick cashew cream with a little salt and you have a French onion dip that ruins the store-bought version forever. They are also wonderful stirred into mashed potatoes, scattered over pizza, folded through pasta, or piled onto crostini.
If you are ever unsure whether a store-bought butter, broth, or cheese in any of these is genuinely vegan, our Is It Vegan database gives you a straight answer faster than reading the fine print in the aisle.
Make-ahead and freezing
The best thing about caramelized onions, given how long they take, is that they store like a dream. There is no reason to make them in tiny single-meal amounts. Cook a big batch when you have the time and bank it.
In the fridge, cooled and sealed in a clean jar, they keep for about five days. The flavor actually deepens overnight, so day-two onions are often better than fresh.
For longer storage, freeze them. Spread the cooled onions flat in a freezer bag and press out the air so you can snap off pieces as needed, or spoon them into an ice cube tray, freeze solid, then pop the cubes into a bag.
Each cube is a perfect single-recipe portion. They keep for about three months and reheat with no loss of flavor at all. Thaw in the fridge overnight, or just drop a frozen cube straight into a hot pan and let it melt back to life.
That make-ahead habit is what finally made these a regular part of my cooking instead of a special-occasion project, and it folds neatly into any batch-cooking routine you already keep.
The takeaway
There is only one secret to caramelizing onions, and it is not a trick: give them the time. Keep the heat low, stir often, deglaze the brown bits back in, salt a little early and finish to taste, and let the clock run a full 40 minutes or more.
Do that and you get deep, jammy, sweet onions that make soups, burgers, and dips taste like they came from a much fancier kitchen. Make a double batch, freeze the extra in cubes, and you will always have that flavor a single spoonful away.
The patience is the whole recipe, and it is worth every minute.
Frequently asked questions
How long does it really take to caramelize onions?+
Properly caramelized onions take 40 to 50 minutes over low to medium-low heat, not the 10 minutes you see in a lot of recipes. Those quick versions give you softened, lightly browned onions, which are tasty but not the same thing. Real caramelization needs time for the water to cook off and the natural sugars to slowly brown. If yours look done in 15 minutes, your heat is too high and you are browning the outsides while the insides stay raw and sharp.
Should I add salt at the start or the end?+
I add a pinch of salt early, right after the onions hit the pan. Salt pulls water out of the onions, which helps them collapse and soften faster and lowers the risk of scorching in the first stretch. The trade-off is that early salt can speed things along almost too much, so keep the heat gentle. You can always adjust seasoning at the very end once you taste the finished onions, since they shrink to a fraction of their starting volume and the salt concentrates.
Why are my onions burning instead of caramelizing?+
Burning means the heat is too high for the moisture left in the pan. Caramelizing is slow, even browning of the sugars, while burning is fast scorching that tastes bitter. Drop the heat, add a splash of water to deglaze and lift the stuck bits, and stir more often. A heavier pan helps too, because thin pans develop hot spots. If the brown film on the bottom is turning black rather than deep amber, you have crossed from caramelized into burnt.
Can you caramelize onions ahead of time and freeze them?+
Yes, and I almost always make a big batch on purpose. Caramelized onions keep in a sealed jar in the fridge for about five days, and they freeze beautifully for up to three months. Freeze them flat in a bag or portioned into an ice cube tray so you can pull out a spoonful at a time. Thaw in the fridge or straight into a hot pan. They reheat with no loss of flavor, which makes them one of the best things to batch cook in advance.

Written by
VeganDigest Editorial is the small independent team that researches and fact-checks this site. We are not doctors or dietitians. For every is-it-vegan verdict we read the product's current ingredient list and manufacturer information, and for anything health-related we report guidance from recognized bodies such as the NHS, the Vegan Society, and the Academy of Nutrition and Dietetics rather than offering medical advice. Every page shows the date it was last verified, and our full process is on the How We Verify page.
Comments