How to Make Seitan (Homemade Vegan Meat)
 Jump to recipe ↓
 In this guide8
The first batch of seitan I ever made looked like a brain. I am not exaggerating.
I followed a recipe that said "boil until firm," cranked the heat, walked away to answer the door, and came back to a pot of rolling, furious water and a pale wrinkled blob the size of a small football that bounced when I poked it. It tasted like a wet eraser.
I almost decided seitan was a food invented by people who hated me.
It was not the recipe. It was the boil. And once I understood the two things that actually matter (how much you knead, and how gently you cook), seitan went from my biggest kitchen failure to the thing people text me about.
So here is everything I wish someone had told me the first time, with the honest mistakes left in.
What Seitan Actually Is
Seitan is wheat gluten, full stop. Gluten is the network of stretchy proteins in wheat that gives bread its chew.
Traditionally, people made seitan by mixing whole wheat flour into a dough and then literally washing it under running water for ages, rinsing out all the starch until only the springy gluten was left. It works, it is meditative, and it uses a lot of water and patience.
The modern shortcut is the only way I make it now: you start with vital wheat gluten, which is wheat flour that has already had the starch washed and dried out of it, sold as a fine tan powder. Bob's Red Mill makes the one I buy, and Anthony's is the other common bag.
You are basically skipping straight to the good part. Hydrate that powder, work it just enough, cook it, and you have a dense, sliceable, genuinely meaty protein that you can turn into deli slices, cutlets, "chicken," or shredded sandwich filling.
If you have ever wondered whether the seasonings and broths you are reaching for are all plant-based, the Vegan Society definition is a good anchor, and you can spot-check anything questionable in our Is It Vegan database.
The Base Recipe You Should Memorize
 Photo: Connor Scott McManus / Pexels
Here is my reliable base. It makes one loaf, enough for about four servings.
Dry mix: 1 and 1/4 cups (about 150 g) vital wheat gluten, 3 tablespoons nutritional yeast, 1 tablespoon onion powder, 1 teaspoon garlic powder, 1 teaspoon smoked paprika, and 1/2 teaspoon fine salt.
Wet mix: 3/4 cup (180 ml) cold low-sodium vegetable broth, 2 tablespoons soy sauce or tamari, and 1 tablespoon tomato paste or 1 tablespoon tahini for body.
Simmering broth: 6 cups (1.4 L) vegetable broth seasoned with a splash more soy sauce, a smashed garlic clove, and a bay leaf.
Whisk the dry ingredients in one bowl. Stir the wet ingredients in another. Pour wet into dry and stir with a fork until it pulls together into a shaggy dough.
That happens fast, within fifteen seconds, because gluten grabs water aggressively. Now stop and read the next two sections before you touch it again, because this is exactly where I used to ruin it.
The nutritional yeast is not optional flavor garnish here, it is doing real savory, slightly cheesy work. If you want to understand why it punches so far above its weight, our nutritional yeast guide breaks it down.
The One Rule: Do Not Over-Knead
Gluten gets tougher the more you work it. That is wonderful in bread and a disaster in seitan if you overdo it. Every extra minute of kneading tightens the protein strands, and tight strands cook up dense, rubbery, and aggressively bouncy.
That eraser texture from my first batch? Half of it was the boil, and half was that I had kneaded the dough for a solid ten minutes because I assumed more was better.
You want to knead for about one minute. Sixty seconds. Just press and fold the dough on the counter until it goes from shaggy to a cohesive, slightly springy ball with no dry powder left.
It should feel like a firm, stretchy muscle, not a smooth silky bread dough. If it tears a little when you pull it, that is fine, that is texture. The second it holds together, you are done.
Walk away.
A quick way to tell you have gone too far: if the dough turns smooth, glossy, and snaps back hard when you stretch it, you have built too much gluten structure. At that point there is no undoing it, you can only let it rest longer and accept a chewier loaf.
So err on the side of stopping early. I genuinely set a sixty-second timer the way I would for a soft-boiled egg, because my hands always want to keep going.
Then, and this matters more than people expect, let it rest for ten minutes before cooking. Resting relaxes the gluten you just tensed up, which gives you a tenderer, less springy bite. I set a timer and wash my bowls.
Skipping the rest is a quiet reason a lot of seitan turns out tough even when the knead was short.
Flavoring It From the Inside
 Photo: Dasha Klimova / Pexels
Seitan is a sponge for whatever you put in it, but it only absorbs flavor well if you build that flavor into the dough and the broth, not just the surface. The nutritional yeast, onion and garlic powder, smoked paprika, soy sauce, and tomato paste in the base recipe are the backbone, giving you a savory, faintly smoky, meaty profile that works for almost anything.
From there, season toward your goal. For a "chicken" style, drop the smoked paprika and tomato paste, add an extra tablespoon of nutritional yeast, a pinch of poultry-style herbs like sage and thyme, and use a paler broth. For a beefy, deli-style loaf, lean into the smoked paprika, add 1/2 teaspoon cumin, and keep the tomato paste.
For a sausage texture, fold in fennel seed, more garlic, and a little chili flake.
The seasoned simmering broth is the second flavor layer, and people skip it constantly. Plain water gives you bland seitan no matter how good the dough is, because the loaf swells as it cooks and drinks in whatever liquid surrounds it.
A well-salted, savory broth seasons the inside the whole time it cooks. If you keep a jar of homemade vegan parmesan around, a spoonful grated into the dough adds a lovely umami depth too.
Simmer or Steam: Pick Your Texture
Two cooking methods, two textures, and this is the other half of the brain-loaf lesson.
Simmering gives you a more open, slightly looser, juicier texture that I prefer for sliced sandwich seitan and stews. The non-negotiable word is simmer, not boil.
Bring your seasoned broth up to where the surface is just barely trembling, with a lazy bubble breaking every few seconds, then drop the heat to hold it there. Slide in your loaf (cut it into two or three pieces first so it cooks evenly), partially cover, and let it go gently for 45 minutes to an hour, turning the pieces once.
A hard boil forces the seitan to expand violently and traps air, which is exactly how you get spongy, wrinkled, rubbery results. Low and slow. If your broth ever reaches a rolling boil, you have already started down the wrong road.
Steaming gives you a firmer, denser, more sliceable loaf, which is what I want for deli slices and "cutlets." Shape the dough into a log, wrap it snugly in parchment and then foil like a fat candy, and steam over simmering water for about 50 minutes.
The tight wrap stops it from puffing, so the texture stays compact. Unwrap, let it cool, and it firms up even more in the fridge. This is my go-to for a sliceable sandwich loaf.
Either way, let the cooked seitan cool in or near its broth and ideally rest in the fridge for a few hours before slicing. Warm seitan straight from the pot is always softer and harder to cut cleanly. The texture sets as it cools.
How to Cook Seitan After It Is Cooked
Here is the part beginners miss: simmered or steamed seitan is cooked, but it is not finished. It is the base, like a precooked chicken breast. The magic happens in a second cooking step that builds crust and char.
Slice or cube your cooled seitan, then pan-fry it in a hot skillet with a little oil until the edges go deep brown and crisp. That browning, the same reaction that makes roasted vegetables and toast taste good, is where seitan stops tasting like a science project and starts tasting like dinner.
You can also toss the pieces in barbecue sauce and bake them, shred a piece and crisp it for tacos, or batter and bake cutlets. A finishing brush of vegan butter at the end of the pan-fry gives it a rich, savory edge that is hard to stop eating.
This two-stage approach (cook the loaf gently, then sear or roast pieces) is the single biggest upgrade to homemade seitan, and almost no first-timer does it. They eat it straight from the simmer, find it pale and bouncy, and give up. Do not be that person.
The Mistakes I Made So You Do Not Have To
The rolling boil, obviously. That was the brain loaf. Gentle simmer only.
Over-kneading was the second. Ten minutes of enthusiastic kneading gave me dense, squeaky seitan. One minute, then rest, fixed it overnight.
Under-seasoning the broth was the third. I once simmered a perfectly good loaf in plain water to "keep it neutral," and it came out tasting like a damp dish sponge. The broth is a flavor step, not just hot liquid.
Adding the gluten to warm liquid was a quieter mistake. Warm broth makes the dough seize and tighten too fast and unevenly. Cold or room-temperature liquid gives you a more even, manageable dough.
I keep my broth in the fridge until the moment I mix.
And finally, expecting it to taste finished straight out of the pot. It will not. Cool it, slice it, sear it.
That is when it arrives.
A Few Honest Notes Before You Start
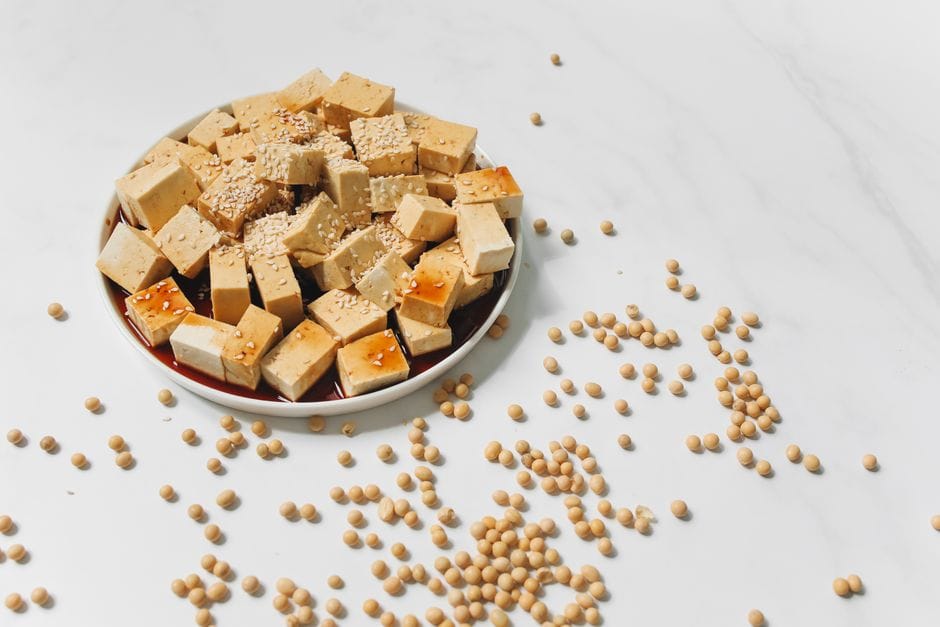
Seitan is one of the most protein-dense plant foods you can make, which is a big part of why I keep a stash in the freezer. But it leans heavily on one ingredient, so I round it out with tofu and tempeh across the week rather than living on it.
If you are new to those, our guide to tofu and our tempeh cooking guide are good next stops.
I will say the loud part plainly, because it matters: seitan is not gluten-free. It is the opposite of gluten-free. It is concentrated wheat gluten and the worst possible food for anyone with celiac disease or a gluten intolerance.
There is no clever swap that makes it safe, because the gluten is the food. If gluten is off the table for you, do not try to adapt this recipe.
Make a tofu or tempeh dish instead, both take seasoning brilliantly and give you that hearty, meaty center without the wheat. And if you are ever unsure whether a marinade, broth, or sauce you want to add is fully plant-based, run it through our vegan ingredient checker before it goes in the pot.
The takeaway is simple and it is the whole game: knead it for about a minute, never let the broth boil, season the dough and the broth, and always finish your slices with a hard sear. Get those four things right and homemade seitan stops being intimidating.
It becomes the cheapest, most satisfying vegan meat you can put on a plate, and you will wonder why you ever bought the packaged kind.
The recipe
How to Make Seitan (Homemade Vegan Meat)
Prep
15 min
Cook
50 min
Makes
4 servings (1 loaf)
Ingredients
- 1 1/4 cups (about 150 g) vital wheat gluten
- 3 tablespoons nutritional yeast
- 1 tablespoon onion powder
- 1 teaspoon garlic powder
- 1 teaspoon smoked paprika
- 1/2 teaspoon fine salt
- 3/4 cup (180 ml) cold low-sodium vegetable broth
- 2 tablespoons soy sauce or tamari
- 1 tablespoon tomato paste (or 1 tablespoon tahini)
- 6 cups (1.4 L) vegetable broth (for simmering)
- Splash of soy sauce (for simmering broth)
- 1 smashed garlic clove (for simmering broth)
- 1 bay leaf (for simmering broth)
Instructions
- 1 Whisk together the vital wheat gluten, nutritional yeast, onion powder, garlic powder, smoked paprika, and fine salt in a large bowl.
- 2 In a separate bowl, stir together the cold vegetable broth, soy sauce or tamari, and tomato paste or tahini.
- 3 Pour the wet ingredients into the dry and stir with a fork until the mixture pulls together into a shaggy dough. This happens within about 15 seconds.
- 4 Knead the dough on the counter for about 1 minute only, pressing and folding until it forms a cohesive, slightly springy ball with no dry powder remaining. Do not over-knead.
- 5 Let the dough rest for 10 minutes uncovered to relax the gluten.
- 6 Meanwhile, combine the simmering broth, splash of soy sauce, smashed garlic clove, and bay leaf in a large pot. Bring to a bare simmer where the surface is just barely trembling with a lazy bubble every few seconds.
- 7 Cut the seitan dough into 2 or 3 pieces for more even cooking.
- 8 Slide the dough pieces into the gently simmering broth, partially cover the pot, and cook for 45 to 60 minutes, turning the pieces once. Never let the broth reach a rolling boil.
- 9 Remove the seitan and let it cool in or near its broth, then refrigerate for at least a few hours before slicing for the best texture.
- 10 To finish, slice or cube the cooled seitan and pan-fry in a hot skillet with a little oil until the edges are deep brown and crisp.
Notes
- ·Keep your broth cold in the fridge until the moment you mix it with the dry ingredients. Warm liquid causes the dough to seize and tighten unevenly.
- ·Knead for exactly about 1 minute and set a timer. Over-kneading is the most common mistake and produces dense, rubbery seitan with no fix once done.
- ·Never let the simmering broth reach a rolling boil. A hard boil forces the seitan to expand violently and traps air, creating a spongy, brain-like texture.
- ·Season the simmering broth well. Simmering in plain water produces bland seitan because the loaf swells and absorbs the surrounding liquid as it cooks.
- ·Always finish with a hard sear in a hot skillet. Seitan eaten straight from the simmer will taste pale and bouncy. The crust and char from searing is where the flavor develops.
- ·For a steamed version (firmer, denser, more sliceable), wrap the shaped dough snugly in parchment then foil and steam over simmering water for about 50 minutes.
- ·Seitan contains concentrated wheat gluten and is not safe for anyone with celiac disease or gluten intolerance. There is no substitute that makes this recipe gluten-free.
- ·Store in a sealed container in the fridge for up to 5 days, ideally in a little of its cooking broth. Freeze for up to 3 months, sliced or cubed on a tray first then bagged.
Frequently asked questions
What is seitan made of?+
Seitan is made almost entirely of wheat gluten, the stretchy protein left behind when you wash the starch out of wheat flour. The easy modern method skips the washing and starts with vital wheat gluten, a powdered flour that is basically pure gluten. You hydrate it with seasoned broth, knead it briefly, then simmer or steam it firm. That is the whole trick.
Why is my seitan spongy or rubbery?+
Almost always over-kneading or boiling too hard. Gluten tightens the more you work it, so a long aggressive knead makes the dough dense and bouncy in a bad way. A rolling boil does the same thing from the outside, blowing the seitan up into a spongy, brain-textured loaf. Knead for about a minute, then simmer gently with the surface just barely trembling, never a hard boil.
Is seitan gluten-free?+
No, and this is the one hard rule. Seitan is pure wheat gluten, so it is the single worst food for anyone with celiac disease or a gluten sensitivity. There is no safe way to make it gluten-free, because removing the gluten removes the food itself. If you need a high-protein meaty plant food without gluten, reach for tofu, tempeh, or beans instead.
How long does homemade seitan last?+
About five days in the fridge in a sealed container, ideally sitting in a little of its cooking broth so it does not dry out. It also freezes beautifully for up to three months. I slice or cube it first, freeze it on a tray, then bag it, so I can grab exactly what I need. Thaw in the fridge overnight before cooking.

Written by
VeganDigest Editorial is the small independent team that researches and fact-checks this site. We are not doctors or dietitians. For every is-it-vegan verdict we read the product's current ingredient list and manufacturer information, and for anything health-related we report guidance from recognized bodies such as the NHS, the Vegan Society, and the Academy of Nutrition and Dietetics rather than offering medical advice. Every page shows the date it was last verified, and our full process is on the How We Verify page.

Comments